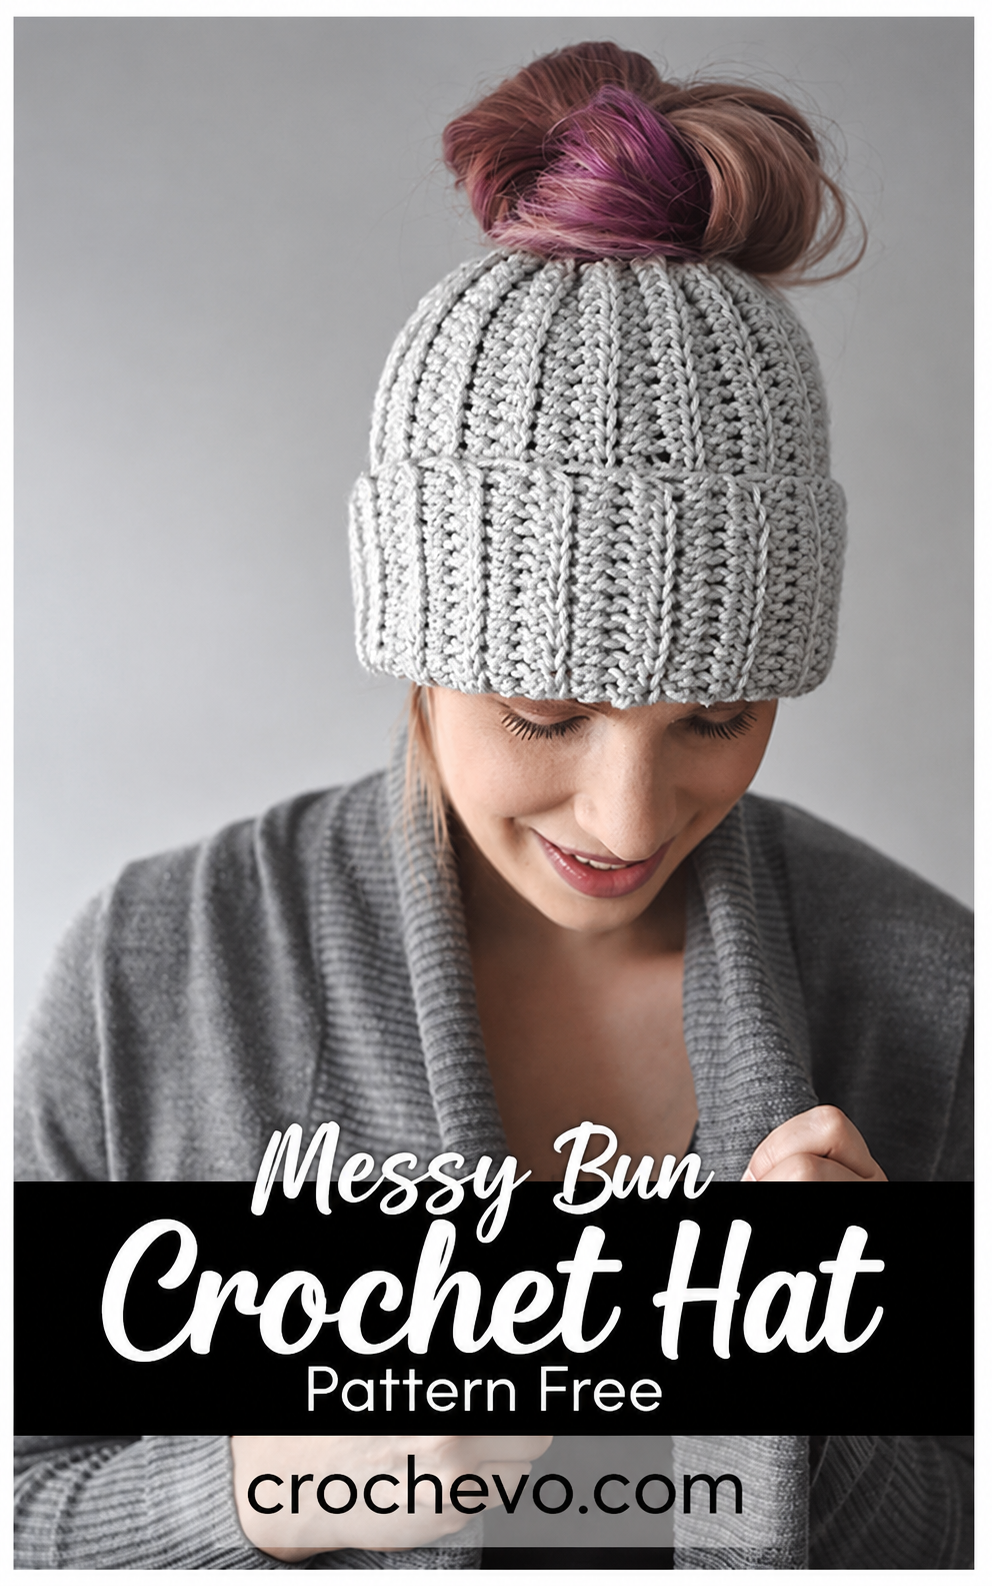
Messy Bun Crochet Hat Pattern Free: Easy Step-by-Step Guide
Do you enjoy wearing a messy bun but still want to keep your head warm? This free messy bun crochet hat pattern is a great choice! It has a neat ribbed look, a cozy brim, and a small opening on top. You can easily pull your ponytail or messy bun through the hole while keeping the rest of your head warm.
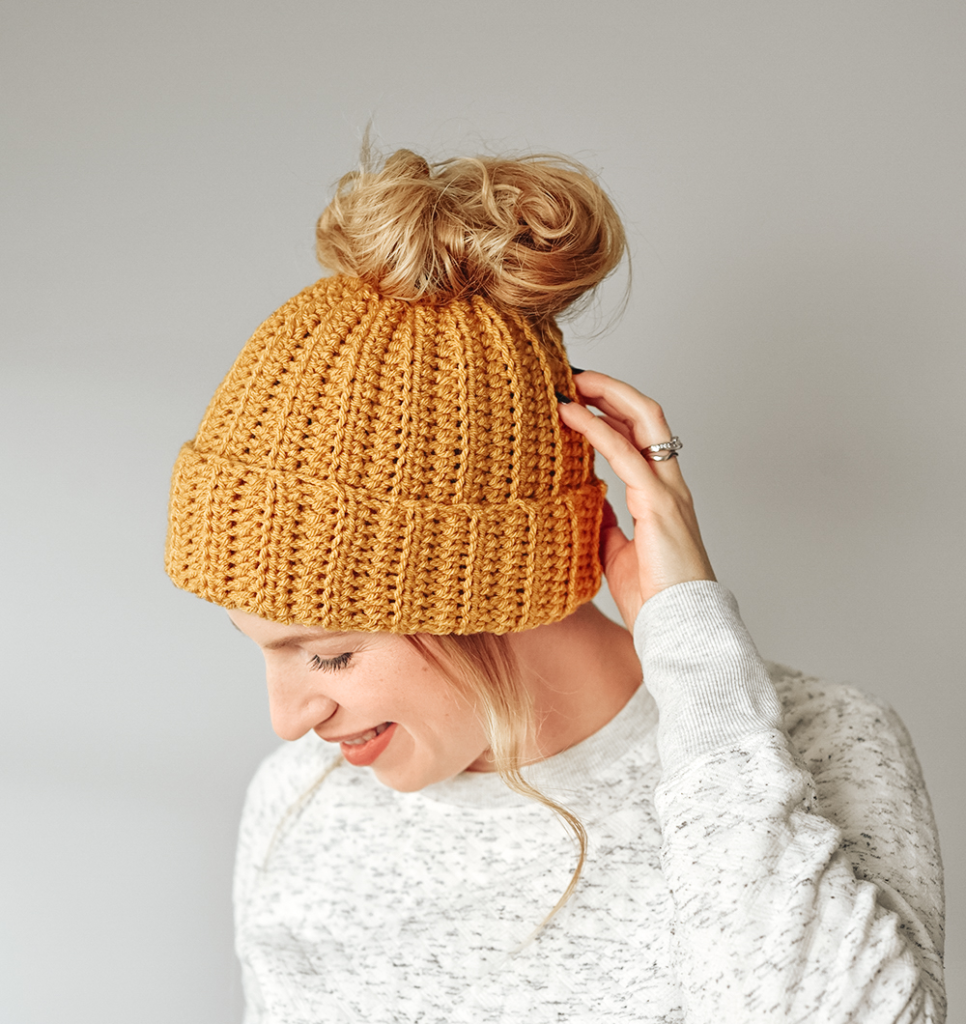
This crochet hat is soft, stretchy, and easy to adjust. It is a fun project for beginners who want to make a ribbed beanie without working on a hard crown.
The steps below will help you make a hat with the same simple look and style as the photo. You can change the size to fit kids, teens, or adults.
What Is a Messy Bun Crochet Hat?
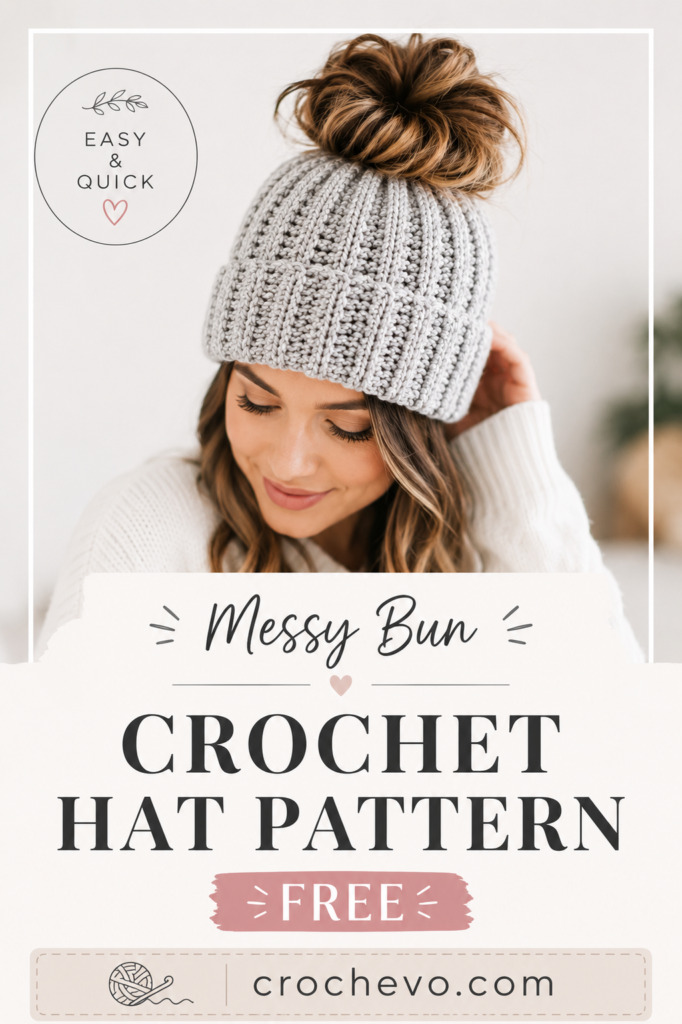
A messy bun hat is a crochet beanie with an opening at the top.
Instead of covering the entire head like a traditional crochet hat, the top remains open. You can pull a ponytail, bun, or high hairstyle through the opening.
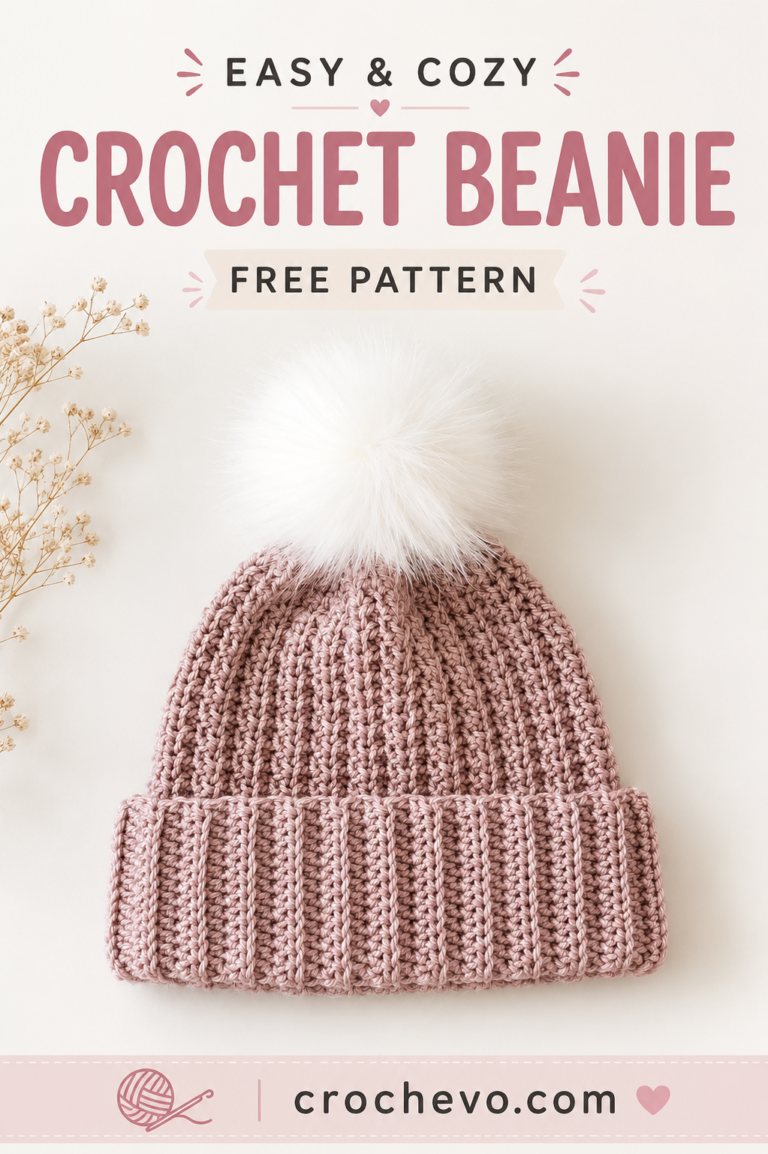
The design shown in the photo has:
- A stretchy ribbed texture
- A wide lower cuff
- A fitted crown
- A round opening at the top
- A simple one-color design
- A clean and cozy everyday look
This makes it a great crochet messy bun hat for fall and winter.
Messy Bun Crochet Hat Pattern Details
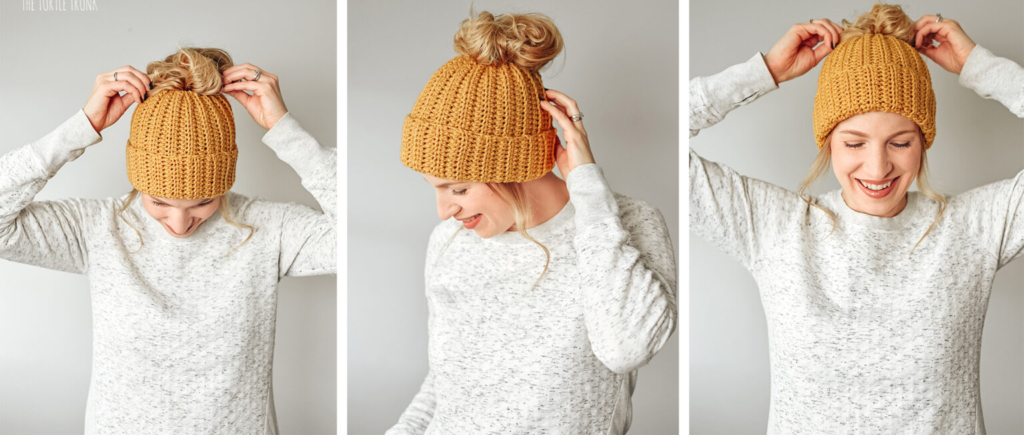
Pattern type: Messy bun beanie
Skill level: Beginner to easy
Construction: Crocheted in rows and seamed
Main stitch: Half double crochet in the back loop only
Yarn: Medium-weight yarn
Hook: 4.5–5.5 mm
Sizes: Teen through adult
Special feature: Open top for a bun or ponytail
Materials You Need
For this messy bun crochet hat pattern, gather:
- Medium-weight worsted yarn
- 5 mm crochet hook
- Yarn needle
- Scissors
- Measuring tape
- Stitch marker
You can use acrylic, wool, wool-blend, or another soft worsted-weight yarn.
For a warm winter hat, wool or a wool blend works especially well.
For an easy-care everyday hat, acrylic yarn is a good choice.
How Much Yarn Do You Need?
The amount depends on the size and yarn you use.
As a rough guide:
- Teen: 100–130 g
- Adult Small: 110–140 g
- Adult Medium: 120–150 g
- Adult Large: 140–170 g
The top opening means this hat usually uses slightly less yarn than a full crochet beanie.
It is still a good idea to have extra yarn available.
Crochet Abbreviations
| Abbreviation | Meaning |
|---|---|
| ch | Chain |
| sc | Single crochet |
| hdc | Half double crochet |
| dc | Double crochet |
| sl st | Slip stitch |
| BLO | Back loop only |
| FLO | Front loop only |
| st | Stitch |
| sts | Stitches |
| rep | Repeat |
| row | Row |
| inc | Increase |
| dec | Decrease |
Stitches Used in This Pattern
The main hat is intentionally simple.
You will mainly use:
- Chain stitch
- Half double crochet
- Half double crochet in the back loop only
- Slip stitch
How to Make a Chain Stitch
Make a slip knot.
Place the loop on your hook.
Yarn over.
Pull the yarn through the loop.
You have made one chain.
Repeat for the required number of chains.
How to Make a Half Double Crochet
The half double crochet is the main stitch used for this hat.
- Yarn over.
- Insert the hook into the stitch.
- Yarn over.
- Pull up a loop.
- You now have three loops on the hook.
- Yarn over.
- Pull through all three loops.
That makes one hdc.
What Does HDC BLO Mean?
HDC BLO means half double crochet worked through the back loop only.
Look at the top of your stitch.
You will see two loops.
Instead of inserting your hook under both loops, insert it only through the loop farthest away from you.
Then complete the half double crochet normally.
Working hdc BLO creates the raised horizontal ridges that give this messy bun crochet hat its stretchy ribbed appearance.
How to Make a Slip Stitch
Insert your hook into the stitch.
Yarn over.
Pull the yarn through the stitch and directly through the loop on your hook.
The slip stitch is mainly used for joining and finishing.
Messy Bun Crochet Hat Size Chart
The easiest way to choose your size is to measure around the head.
| Size | Head Circumference | Approx. Hat Height |
|---|---|---|
| Teen | 20–21 in / 51–53 cm | 8–8.5 in / 20–22 cm |
| Adult Small | 21–22 in / 53–56 cm | 8.5–9 in / 22–23 cm |
| Adult Medium | 22–23 in / 56–58 cm | 9–9.5 in / 23–24 cm |
| Adult Large | 23–24 in / 58–61 cm | 9.5–10 in / 24–25 cm |
Because the ribbed crochet fabric stretches, the finished hat should generally be slightly smaller than the head circumference.
Before You Start: Measure the Head
Wrap a measuring tape around the widest part of the head.
Write down the measurement.
For example, if the head measures:
22 inches
you can make the finished hat approximately:
20.5–21 inches
The ribbing will stretch comfortably around the head.
How This Messy Bun Hat Is Made
This design is very easy to construct.
Instead of starting at the crown and working downward, you make a long ribbed rectangle.
Then you:
- Fold the rectangle.
- Sew the short sides together.
- Gather the top.
- Leave a hole in the center.
- Finish the top opening.
- Shape the lower cuff.
This creates the open-top beanie seen in the photo.
Part 1: Start the Ribbed Hat
Use your main yarn color.
The starting chain determines the height of the hat.
For an adult medium, start with:
Chain 36
Do not worry if this seems short.
The ribbing will stretch vertically.
Row 1
Hdc in the third chain from the hook.
Continue working 1 hdc in each chain across.
Turn.
You should have approximately:
34 hdc
Row 2
Chain 2.
Turn.
Work:
1 hdc BLO in every stitch across.
Turn.
The chain 2 does not count as a stitch for this pattern.
Row 3
Chain 2.
Turn.
Work:
1 hdc BLO in every stitch across.
Turn.
You should start seeing a raised ribbed texture.
Rows 4–50
Continue repeating Row 3.
Every row is:
Ch 2, hdc BLO across, turn.
Keep your tension even.
As you continue, the fabric will become stretchy and ribbed.
How Many Rows Should You Make?
The number of rows controls the circumference of the hat.
This is important.
For the adult medium size, begin with approximately 50 rows.
Then gently stretch the rectangle and measure it.
You want it to reach around the head with a little negative ease.
Approximate row counts
| Size | Approx. Rows |
|---|---|
| Teen | 44–48 |
| Adult Small | 46–50 |
| Adult Medium | 50–54 |
| Adult Large | 54–58 |
These numbers are only a starting point.
Your yarn and tension can change the size considerably.
Measure the actual fabric instead of relying only on row count.
Part 2: Check the Hat Width
Lay the finished rectangle flat.
Measure the long side.
For an adult medium, you want approximately:
20.5–21 inches
before sewing.
If it is too short, crochet additional rows.
If it is too long, remove a few rows.
The fabric should stretch comfortably without feeling tight.
Part 3: Create the Side Seam
Fold your rectangle in half.
Bring the two short edges together.
Use a yarn needle and matching yarn.
Sew the edges together.
You can use:
- Whip stitch
- Mattress stitch
- Slip stitch seam
A mattress stitch gives a neat seam, while a whip stitch is quick and easy.
Once the seam is complete, you have a hat-shaped tube.
Part 4: Prepare the Top Opening
Now we create the opening for the messy bun.
Place the hat flat with the seam at the back.
The top edge will become the opening.
You want the opening to be large enough for a bun or ponytail but not so large that the hat falls off.
A good starting size is:
2.5–3.5 inches
across.
For thick hair or a large messy bun, make the opening larger.
For fine hair, make it smaller.
Part 5: Create the Top Opening With a Drawstring
This is one of the easiest ways to finish a messy bun hat.
Take a long piece of yarn.
Thread it onto your yarn needle.
Weave it around the top edge of the hat.
Go in and out through the stitches.
Continue all the way around.
Do not pull the yarn yet.
Pull the Top Closed
Place the hat on your head or over a bowl that is close to your head size.
Pull the yarn gently.
The top edge will gather.
Stop when the opening reaches your desired size.
For the design in the photo, keep a round opening rather than closing the top completely.
Secure the Opening
Once you have the correct opening size:
- Pull the yarn gently.
- Make a small knot.
- Sew the yarn through several nearby stitches.
- Secure it firmly.
- Weave the remaining yarn into the inside.
Do not make the opening too tight.
Your bun should pass through comfortably.
Part 6: Make the Top Opening Neater
For a cleaner finished edge, crochet around the opening.
Attach yarn anywhere around the top.
Round4 1
Chain 1.
Work 1 sc in each stitch around.
Join with a slip stitch.
Round 2
Chain 1.
Work 1 sc around.
Join.
Fasten off.
This creates a simple finished edge around the bun opening.
Optional Stretchy Opening
If you want the opening to stretch more, use single crochet through the back loop only.
Round
Chain 1.
Work:
1 sc BLO around.
Join.
Repeat for one more round.
This creates a stretchy ribbed edge that fits different hairstyles.
Part 7: Create the Wide Cuff
The picture shows a thick ribbed band around the bottom of the hat.
If you have already made the main body as one rectangle, the cuff is created by working additional rows along the bottom edge.
Attach yarn to the bottom edge.
Cuff Round 1
Chain 2.
Work 1 hdc around the bottom edge.
Try to keep the stitches evenly spaced.
Join with a slip stitch.
Cuff Round 2
Chain 2.
Work:
1 hdc BLO in each stitch around.
Join.
Cuff Round 3
Repeat:
1 hdc BLO around.
Join.
Cuff Round 4
Repeat:
1 hdc BLO around.
Join.
Cuff Round 5
Repeat again if you want a wider cuff.
The photo has a noticeable wide band, so 4–6 rounds gives a similar effect.
Alternative: Make the Cuff First
You can also create the hat in two sections.
First crochet a ribbed band.
Then crochet the crown directly from the band.
This method creates a more traditional beanie construction.
However, the rectangle-and-seam method is easier for beginners and gives a very similar ribbed appearance.
How to Make the Crown More Rounded
The pictured hat has a gently rounded crown around the top opening.
If your crown looks too flat, add a few rows above the cuff before gathering the opening.
The ribbed fabric naturally pulls inward when gathered.
Avoid pulling the opening completely closed.
How to Make a Larger Messy Bun Opening
If you have long or thick hair, increase the opening.
A 3–4 inch opening works better for a large bun.
You can also use a ponytail holder around the opening.
This helps keep the opening neat while giving extra stretch.
How to Make a Smaller Opening
For a small ponytail or smaller bun:
- Use a 2–2.5 inch opening.
- Add a tighter finishing round.
- Use a smaller crochet hook around the opening.
Do not make the opening so small that it pulls the hat upward.
Crochet Hair Bun Opening With a Hair Tie
There is another simple option.
- Use a soft elastic hair tie.
- Place it around the opening.
- Crochet or sew around the hair tie.
- This creates a flexible opening that automatically stretches when you pull your bun through it.
It can be especially useful for people with thick hair.
How to Get the Exact Ribbed Look
The ribbing is the most noticeable feature in the photo.
For the best result:
Work every row in BLO
This creates the raised ridges.
Keep your tension consistent
If your tension changes from row to row, the ribs may look uneven.
Do not use a very large hook
A hook that is too large can make the fabric loose and reduce the ribbed appearance.
Stretch the fabric while checking the size
The ribbing becomes wider when stretched.
Gauge for the Messy Bun Crochet Hat
A useful starting gauge is approximately:
14–16 hdc = 4 inches
and
10–12 rows = 4 inches
Your gauge does not have to be exact if you are measuring the hat as you work.
If your stitches are very tight, use a larger hook.
If your stitches are very loose, use a smaller hook.
How to Resize the Hat
This pattern is easy to resize.
To make it wider
Add more rows.
Remember:
More rows = larger circumference.
To make it smaller
Use fewer rows.
To make it taller
Start with more chains.
To make it shorter
Start with fewer chains.
Newborn and Baby Version
Although the picture shows an adult hat, you can adapt the same construction for smaller sizes.
For a baby messy bun hat, however, the open-top style is generally more useful for older children with longer hair.
For a small size, reduce both the starting chain and number of rows.
Always measure the actual head rather than relying only on age.
Toddler and Child Version
For children who wear their hair in ponytails or small buns, make the opening smaller than an adult version.
A starting opening of around:
2–2.5 inches
can work well.
Adjust based on the hairstyle and head size.
Adult Small
Use approximately:
- 34–36 starting chains
- 46–50 rows
- 2.5–3 inch opening
Check the head measurement before finishing.
Adult Medium
Use approximately:
- 36 starting chains
- 50–54 rows
- 3 inch opening
This is a good starting point for the design shown in the photo.
Adult Large
Use approximately:
- 38–40 starting chains
- 54–58 rows
- 3–3.5 inch opening
Increase the opening if the wearer has thick hair.
How to Wear a Messy Bun Crochet Hat
This hat is very simple to wear.
- Put your hair into a bun or high ponytail.
- Place the hat over your head.
- Pull the bun through the top opening.
- Adjust the brim around your forehead.
- Gently arrange the hair around the opening.
The result is a warm head and ears while your hairstyle stays outside the hat.
Common Problems and Easy Fixes
My hat is too loose
The rectangle is probably too wide.
Remove a few rows or use a smaller hook.
My hat is too tight
Add more rows to the rectangle.
You can also use a larger hook.
My ribs are not visible
Make sure you are working into the back loop only.
Also check that your tension is not too loose.
My hat does not stretch
Hdc BLO should create a naturally stretchy fabric.
If yours feels stiff, try a larger hook or make sure you are not accidentally working through both loops.
The opening is too big
Pull the gathering yarn tighter.
You can also crochet one or two additional rounds around the opening.
The opening is too small
Loosen the gathering yarn.
If necessary, remove the top finishing round and remake it with a larger opening.
The hat keeps sliding backward
The hat may be too loose.
You can make the circumference slightly smaller or add a tighter ribbed band around the bottom.
The cuff is too narrow
Add more rounds of hdc BLO.
The cuff is too wide
Remove one or two rounds.
How to Make the Hat Extra Warm
For a warmer messy bun crochet hat, use:
- Wool yarn
- Wool-blend yarn
- Chunkier yarn
- A smaller hook
You can also sew a soft fleece lining inside the hat.
How to Make a Lightweight Version
For spring and fall, use:
- Cotton yarn
- Cotton blend
- Lightweight acrylic
Use a slightly larger hook to create a softer fabric.
Messy Bun Crochet Hat Color Ideas
The simple ribbed design looks great in almost any color.
Classic Gray
The color shown in the picture is a soft neutral gray.
Black
A black messy bun beanie looks simple and stylish.
Cream
Perfect for a soft winter outfit.
Dusty Pink
A pretty choice for a feminine hat.
Forest Green
Great for a cozy autumn look.
Mustard
A warm fall color that makes the ribbing stand out.
Multicolor
Use different colors for the cuff and crown.
Add a Pom-Pom
Although the pictured design has an open top for a bun, you can decorate the edge with a small pom-pom.
Make a yarn pom-pom.
Attach it near the back of the opening.
This gives the hat a playful winter look.
Add a Decorative Button
For an adult version, you can sew a wooden or decorative button onto the side of the cuff.
Make sure the button is securely attached.
This is a simple way to personalize your hat.
How to Care for Your Crochet Hat
Check your yarn label before washing.
For most washable yarns:
- Wash in cool water.
- Use mild detergent.
- Avoid harsh scrubbing.
- Do not wring the hat.
- Gently squeeze out excess water.
- Reshape it.
- Lay flat to dry.
Avoid high heat because it may shrink or damage the crochet.
How Long Does This Project Take?
A beginner may need around 3–5 hours to complete the hat.
An experienced crocheter may finish it in around 2–3 hours.
The simple repeating ribbed stitch makes this a relaxing project to work on while watching a movie or listening to music.
Why You Will Love This Messy Bun Crochet Hat
There are several reasons this style is so useful.
It keeps your ears warm.
The wide ribbed cuff provides comfortable coverage.
It works with high hairstyles.
You do not have to take your bun down to put on the hat.
It is stretchy.
The BLO ribbing creates a flexible fabric.
It is beginner-friendly.
The main stitch pattern repeats over and over.
It is easy to customize.
Change the yarn color, opening size, cuff width, or hat height.
Frequently Asked Questions
What is a messy bun crochet hat?
It is a crochet beanie with an opening at the top that allows a messy bun, ponytail, or high hairstyle to come through.
What stitch is best for a messy bun hat?
Half double crochet worked in the back loop only is an excellent choice because it creates stretchy vertical ribbing.
How big should the opening be?
A 2.5–3.5 inch opening is a good starting point for most adults. Make it larger for thick hair or a large bun.
Can beginners crochet this hat?
Yes. The main pattern uses simple stitches and a repeating BLO technique.
Can I make the hat without a messy bun opening?
Yes. Simply gather and close the top completely to turn it into a regular crochet beanie.
Can I make this hat for different sizes?
Yes. Change the number of rows to adjust the circumference and change the starting chain to adjust the height.
What yarn is best for this pattern?
Medium-weight worsted yarn is a good choice. Acrylic is easy to care for, while wool or wool blends provide extra warmth.
Why does my ribbing look different?
Crochet tension, yarn thickness, and hook size all affect the appearance. Make sure every row is worked through the back loop only for consistent ribs.
Final Thoughts
This messy bun crochet hat pattern free design is a simple and practical project with a cozy handmade look. The ribbed texture gives the hat plenty of stretch, while the open top makes it perfect for messy buns, ponytails, and other high hairstyles.
The wide cuff adds warmth around the ears and forehead, while the simple one-color design makes it easy to wear with almost any outfit.
Once you understand the basic hdc BLO stitch, the entire hat becomes a simple repeat. You can make it in classic gray like the pictured design, or choose your favorite color for a completely personalized crochet messy bun hat.
It is a great quick crochet project for yourself, a handmade gift, or a cozy accessory for the colder months. 🧶🩶