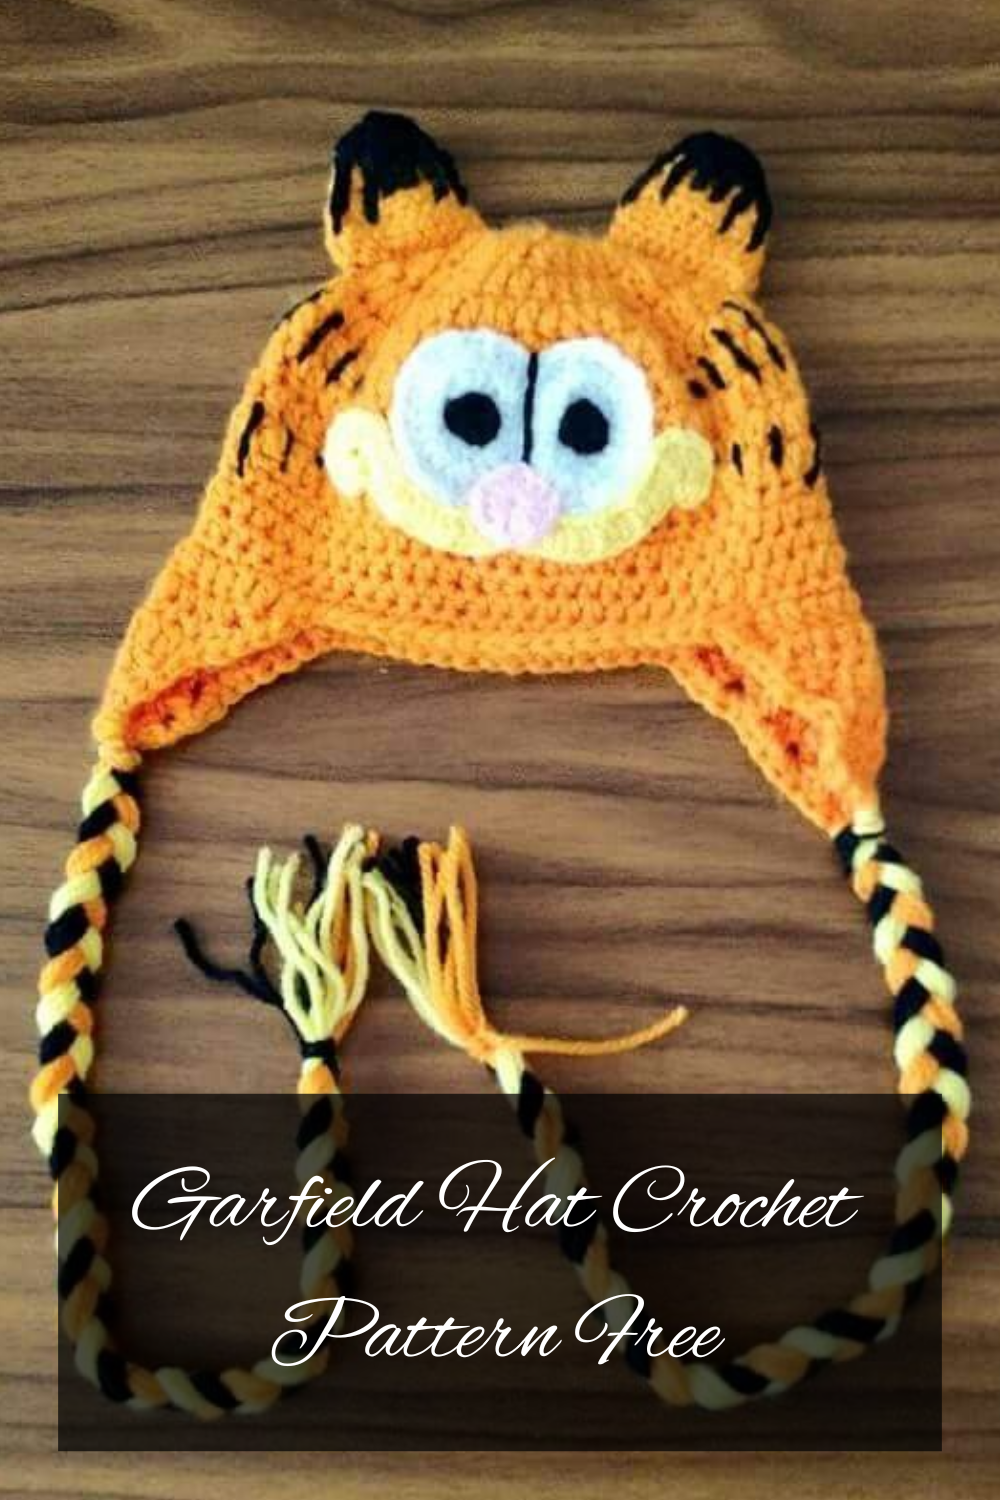
How to Crochet a Garfield Hat: A Fun and Cozy DIY Project
If you love Garfield, the famous lasagna-loving orange cat, this crochet Garfield hat is the perfect handmade project to bring his playful personality to life. With its bright orange color, cute facial details, and recognizable cartoon-inspired design, this hat makes a fun accessory for kids, fans, and anyone who enjoys unique crochet creations.
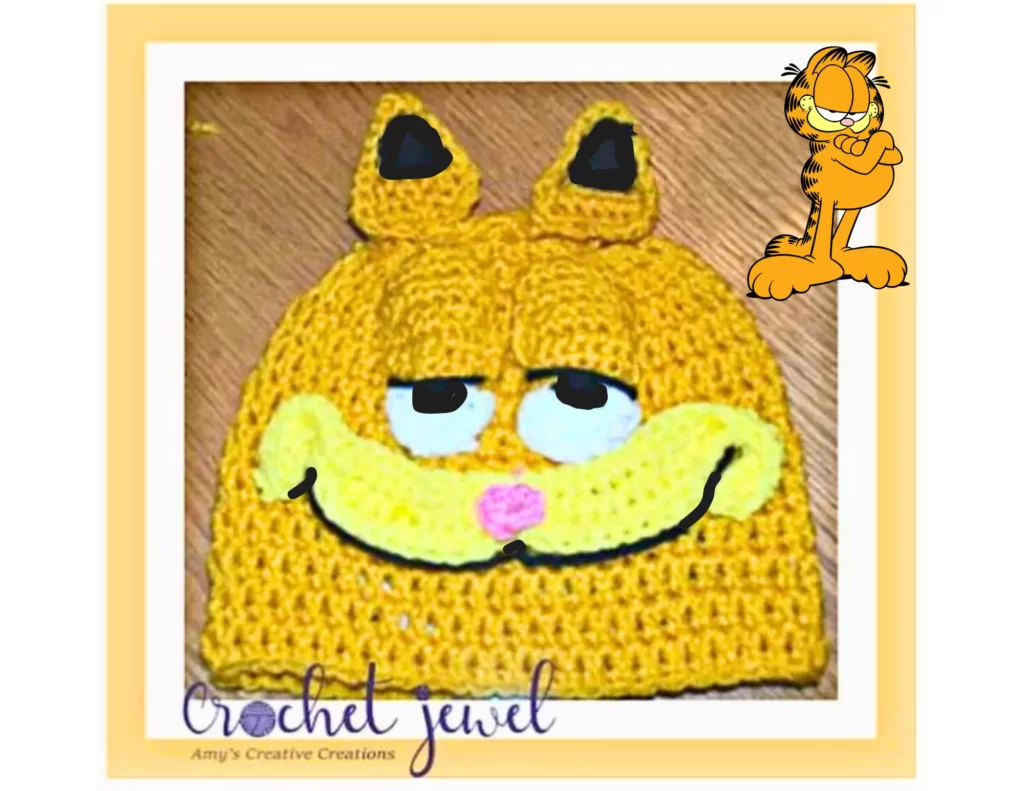
Whether you’re making it as a gift or creating one for yourself, this step-by-step pattern will guide you through making your own Garfield-inspired winter hat. You’ll learn how to crochet the hat base, add ear flaps, create the eyes and ears, and finish it with Garfield’s signature facial features.
Perfect for confident beginners and experienced crocheters alike. With basic crochet skills, you can easily make and personalize this hat to your desired size and style.
Why You’ll Love This Crochet Garfield Hat
- Fun character-inspired design
- Great handmade gift idea for Garfield fans
- Simple to personalize with your favorite yarn colors.
- Works well for children and adults
- A cozy project perfect for colder weather
The classic orange color, black details, and playful expression make this crochet Garfield hat instantly recognizable and full of personality.
Yarn and Materials Needed
For this pattern, worsted weight yarn works best because it creates a comfortable hat with a nice structure. You can also experiment with different yarn weights depending on how thick or warm you want your finished hat to be.
Supplies
- H crochet hook
- G crochet hook
- Tapestry needle
- Stitch marker
- Fiberfill stuffing (for the eyes and details)
- Orange or gold yarn (main hat color)
- Black yarn (stripes and facial details)
- White yarn (eyes)
- Yellow yarn (mouth area)
- Pink yarn (nose)
The finished hat measures approximately 19–20 inches, making it a great size for a young child around 4 years old. You can adjust the pattern by changing the number of rounds or using a different hook size.
Crochet Abbreviations
- ch – chain
- sl st – slip stitch
- sc – single crochet
- dc – double crochet
- hdc – half double crochet
- dc2tog – double crochet two together
- sc2tog – single crochet two together
- hdc2tog – half double crochet two together
Crochet Garfield Hat Instructions
Hat Body
Using orange yarn and an H hook
Round 2
Ch 3 (counts as first dc), dc in the same stitch as joining. Work 2 double crochets (dc) in each stitch around, then join the round with a slip stitch to the top of the beginning chain.
Total: 22 dc
Round 3
Ch 3 (counts as first dc). 2 dc in next stitch, dc in next stitch. Repeat around. Join with a slip stitch.
Total: 33 dc
Round 4
Ch 3 (counts as first dc). Dc in next stitch, Work 2 dc in the next stitch, then repeat this pattern around. Join the round with a slip stitch.
Total: 44 dc
Round 5
Ch 3 (counts as first dc).Work 1 dc in each of the next 2 stitches, then make 2 dc in the following stitch. Repeat around. Join with a slip stitch.
Total: 55 dc
Rounds 6 Until Desired Length
Ch 3 (counts as first dc). Dc in each stitch around. Join with a slip stitch.
Continue until the hat reaches your preferred height. For this size, the hat length is approximately 7 inches. Fasten off and weave in the ends.
Adding Ear Flaps
Create 2 ear flaps using orange yarn with an H crochet hook.
Attach yarn to the side of the hat where you want the flap placed. For a balanced look, position the second flap directly opposite the first.
Row 1
Ch 2, dc in the next 11 stitches. Turn.
11 stitches
Row 2
Ch 2, dc2tog, dc in the next 6 stitches, dc2tog, dc in the last stitch. Turn.
9 stitches
Row 3
Ch 2, dc2tog, dc in the next 4 stitches, dc2tog, dc in the last stitch. Turn.
7 stitches
Row 4
Ch 2, dc2tog, dc in the next 2 stitches, dc2tog, dc in the last stitch. Turn.
5 stitches
Row 5
Ch 2, dc2tog twice, dc in the last stitch. Fasten off.
3 stitches
For the ties, attach orange and white yarn to the bottom center of each ear flap. Chain approximately 30 stitches, slip stitch back, and fasten off.
Single crochet around the edge of the hat using white yarn for a clean finished border.
Garfield Eyes
Make 4 pieces using white and orange yarn.
Orange Eye Top
Using orange yarn and an H hook:
Row 1
Ch 10. Sc in the second chain from the hook and across.
9 stitches
Rows 2–3
Ch 1. Sc across. Turn.
Row 4
Ch 1. Sc2tog, sc across, sc2tog. Turn.
7 stitches
Rows 5–6
Ch 1. Sc across. Turn.
Row 7
Ch 1. Sc2tog, sc across, sc2tog. Turn.
5 stitches
Fasten off. Add a small amount of stuffing before sewing it onto the hat.
White Eye Bottom
Using white yarn and a G hook:
Ch 2. Work 7 dc into the second chain from the hook.
Round 2
Work 2 dc in the first stitch, dc around, and 2 dc in the last stitch. Fasten off.
Sew the orange and white eye pieces together. Add black yarn details to create the pupils and eye separation line.
Attach the eyes below the ears, leaving a small space between them.
Garfield Ears
Make 2 using orange yarn and an H hook.
Row 1
Ch 9. Sc in the second chain from the hook and across.
8 stitches
Row 2
Ch 1. Sc across. Turn.
Row 3
Ch 1. Sc2tog, sc across, sc2tog. Turn.
6 stitches
Rows 4–5
Ch 1. Sc across. Turn.
Row 6
Ch 1. Sc2tog, sc across, sc2tog. Turn.
4 stitches
Row 7
Ch 1. Sc2tog, sc across, sc2tog. Turn.
2 stitches
Row 8
Sc evenly around the entire ear edge. Fasten off.
Use black yarn to stitch several loose horizontal stripes near the top of each ear. Sew the ears above the eyes, slightly below the top edge of the hat.
Nose and Mouth Details
Nose
Using pink yarn and a G hook:
Ch 2. Work 8 sc into the second chain from the hook. Sew the nose onto the center of the yellow mouth piece.
Mouth
Using yellow yarn and an I hook:
Row 1
Ch 41. Work hdc in the second chain from the hook, then continue across the row.
40 hdc
Rows 2–3
Slip stitch across the first 10 stitches, hdc across the middle 20 stitches, then slip stitch across the final 10 stitches. Turn.
Tie the center of the mouth piece to create Garfield’s smile shape. Sew it below the eyes and shape the sides upward. Add a black curved line at the bottom of the smile for extra detail.
Final Thoughts
Making a crochet Garfield hat is a fun way to combine your love of crochet with a classic cartoon character. With simple stitches, colorful yarn, and a little creativity, you can create a warm and playful hat that is perfect for winter, costumes, birthdays, or everyday wear.
Feel free to adjust the colors, size, and details to create your own unique version. Once finished, share your handmade Garfield hat with other crochet lovers and enjoy showing off your creation!
Happy crocheting!