3 Weight Yarn Crochet Hat Pattern Free
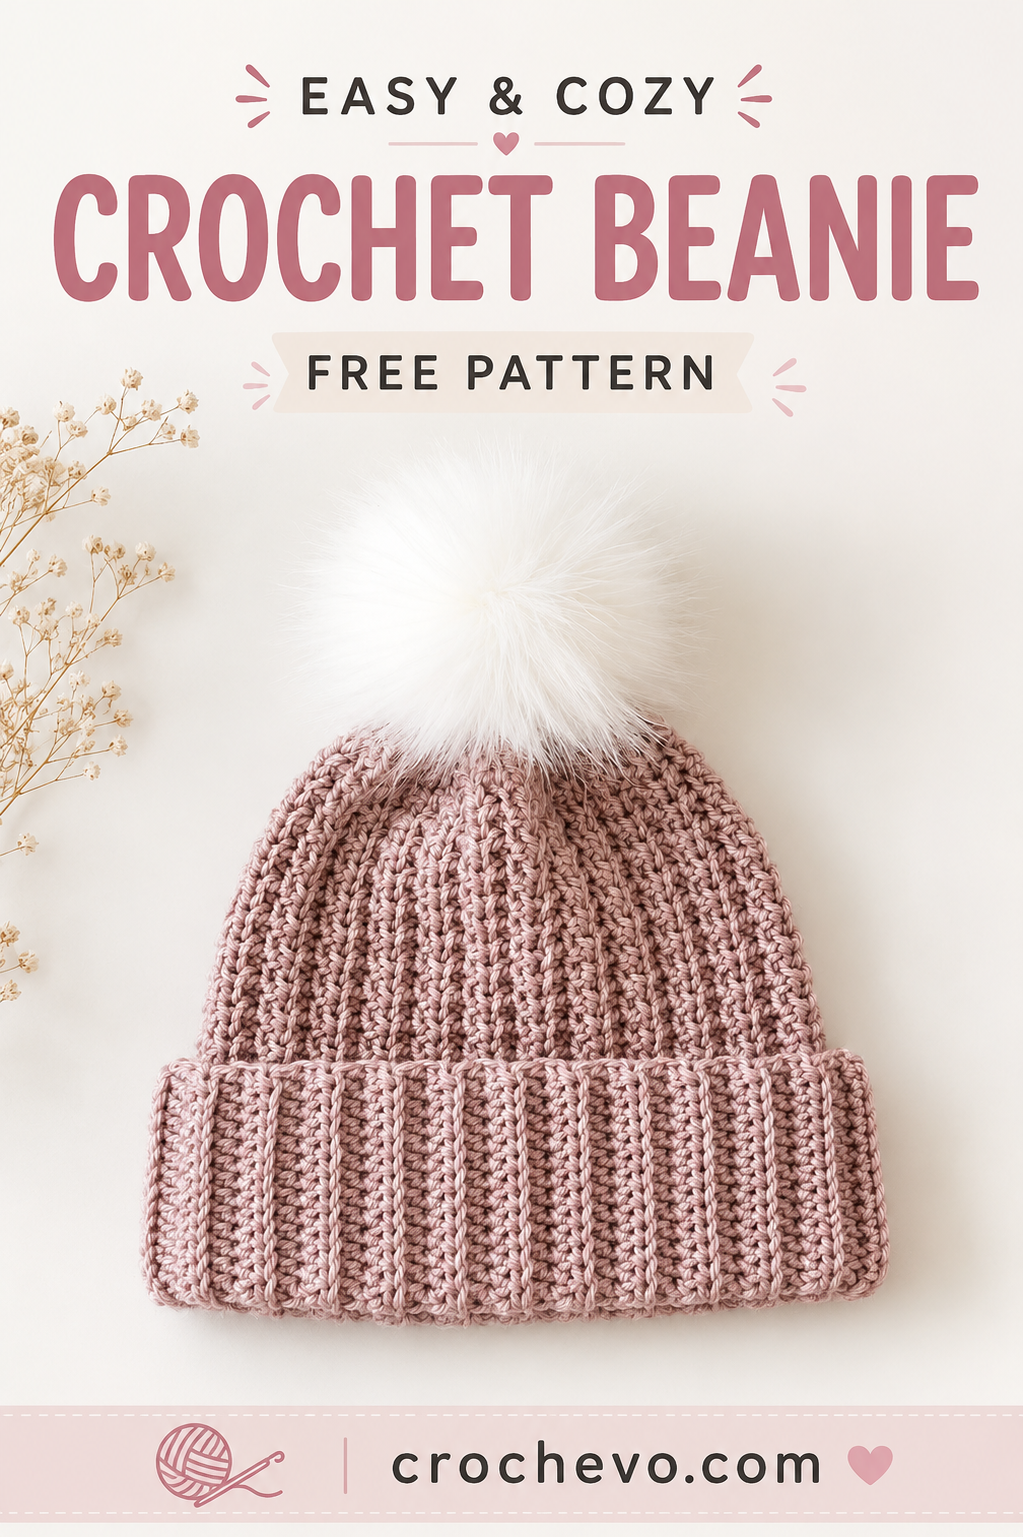
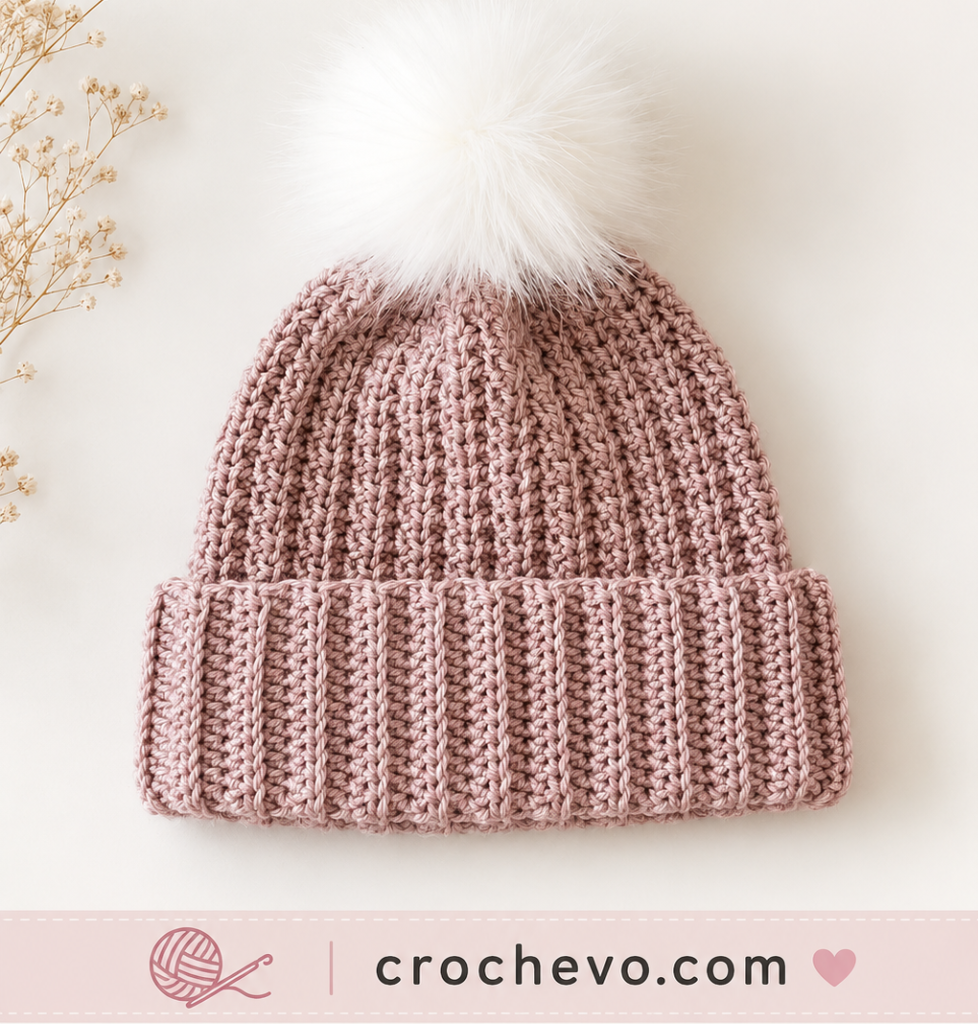
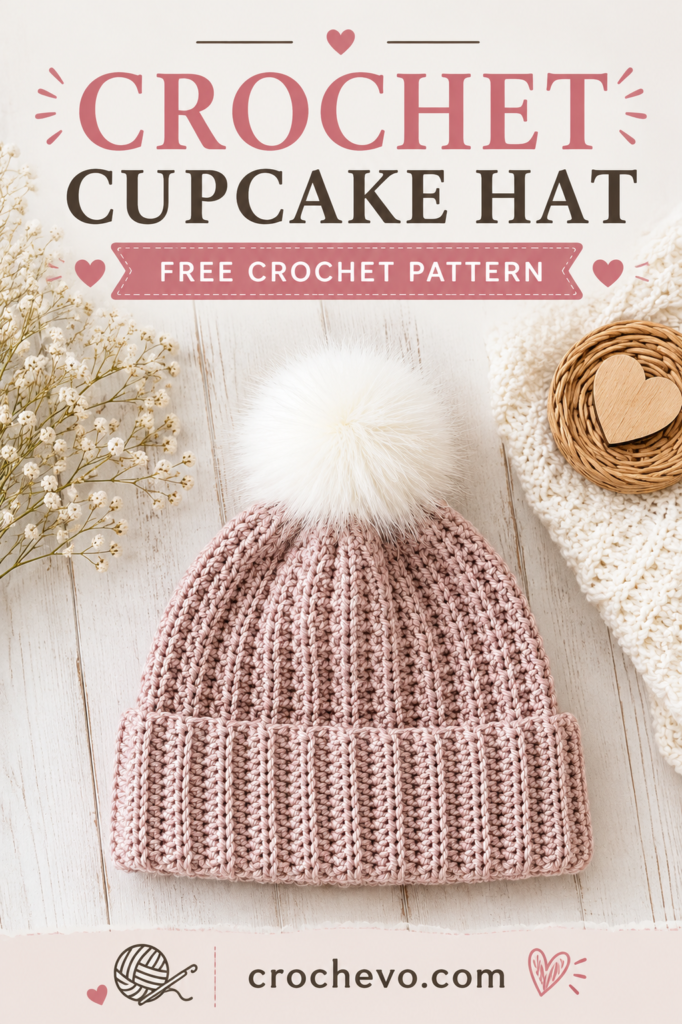
Looking for a soft, lightweight hat that is easy to crochet? This 3 weight yarn crochet hat pattern free is inspired by the beautiful hat in the photo. It has a wide folded ribbed brim, a simple textured crown, and a fluffy pom-pom on top.
The design is simple, warm, and comfortable without feeling too heavy. Using lightweight #3 yarn gives the hat a soft drape and a neat stitch definition.
This pattern is written in simple steps, with every important stitch explained so beginners can follow along.
About This Crochet Hat
This hat is worked from the bottom upward.
The brim is made first as a long ribbed strip. The short ends are joined to form a circle. The body is then crocheted around the top of the brim, gradually decreasing toward the crown.
The finished design has:
- A wide folded brim
- Vertical ribbing on the brim
- A textured crochet body
- A gently rounded crown
- A fluffy pom-pom
- A soft, fitted look
The hat in the photo uses one main yarn color, but you can easily change the color if you prefer.
Materials
You will need:
- #3 lightweight yarn
- 3.5 mm or 4 mm crochet hook
- Yarn needle
- Scissors
- Stitch marker
- Large fluffy pom-pom
- Measuring tape
For the closest look to the photo, choose a soft #3 yarn in a dusty rose, mauve, blush, cream, gray, or another muted color.
Yarn Amount
The exact amount depends on the size and your tension.
As a general guide:
- Baby: 50–70 g
- Toddler: 60–80 g
- Child: 70–90 g
- Teen: 80–100 g
- Adult Small: 90–110 g
- Adult Medium: 100–120 g
- Adult Large: 110–140 g
A large pom-pom will require a little extra yarn if you are making it yourself.
Crochet Abbreviations
| Abbreviation | Meaning |
|---|---|
| ch | Chain |
| sc | Single crochet |
| hdc | Half double crochet |
| dc | Double crochet |
| sl st | Slip stitch |
| BLO | Back loop only |
| FLO | Front loop only |
| st | Stitch |
| sts | Stitches |
| inc | Increase |
| dec | Decrease |
| hdc2tog | Half double crochet 2 together |
| rep | Repeat |
This pattern uses mainly half double crochet, which gives the hat a soft and slightly textured fabric.
Hat Sizes
Measure around the head before starting.
| Size | Head Circumference | Approx. Height |
|---|---|---|
| Newborn | 13–14 in / 33–36 cm | 5.5–6 in |
| Baby | 14–16 in / 36–41 cm | 6–6.5 in |
| Toddler | 17–18 in / 43–46 cm | 6.5–7 in |
| Child | 18–20 in / 46–51 cm | 7–7.5 in |
| Teen | 20–21.5 in / 51–55 cm | 7.5–8 in |
| Adult Small | 21–22 in / 53–56 cm | 8 in |
| Adult Medium | 22–23 in / 56–58 cm | 8–8.5 in |
| Adult Large | 23–24 in / 58–61 cm | 8.5–9 in |
For a comfortable fit, the finished hat should be slightly smaller than the actual head circumference because crochet stretches.
How to Measure the Head
Place a measuring tape around the widest part of the head.
Measure:
across the forehead → around the ears → around the back of the head.
Do not pull the measuring tape too tightly.
Write down the measurement before you begin.
Gauge
For a similar fabric, aim for approximately:
16–18 hdc = 4 inches
and
12–14 rows = 4 inches
Gauge can vary between crocheters, so making a small swatch is helpful.
If your stitches are too loose, use a smaller hook.
If your stitches are too tight, use a larger hook.
Part 1: Crochet the Ribbed Brim
The brim is the most noticeable feature of this hat.
It is wide, stretchy, and folded upward.
We will crochet it as a flat strip and then join it into a circle.
Adult Medium Brim
With your #3 yarn, make:
Chain 21.
This gives you approximately a 4–4.5 inch brim when worked in hdc.
For a shorter brim, chain 17–19.
For a taller folded brim, chain 23–25.
Row 1
Starting in the second chain from your hook:
Work:
1 hdc in each chain across.
You should have:
20 hdc
Chain 1.
Turn.
Row 2
Now work into the back loop only.
Make:
1 hdc BLO in every stitch across.
Chain 1.
Turn.
What Does BLO Mean?
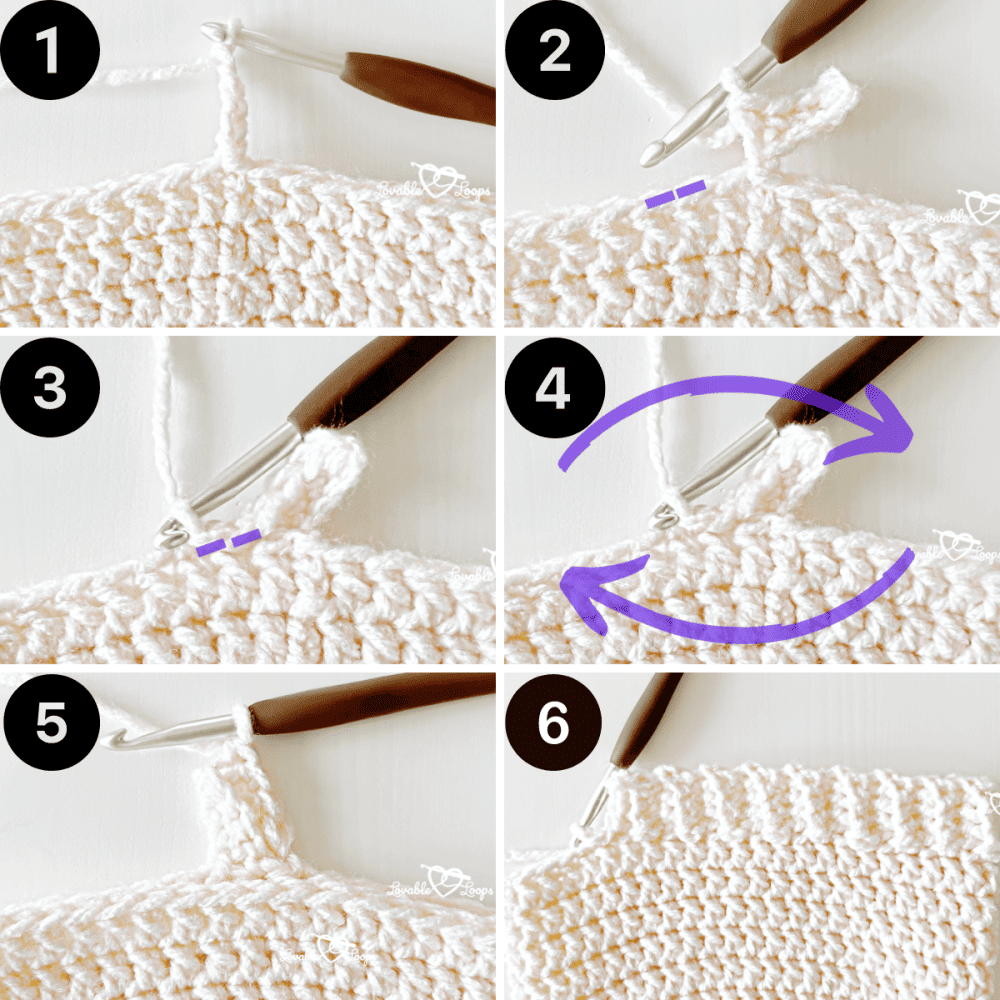
BLO means back loop only.
Look at the top of your stitch.
You will see two loops that look like a small V.
The loop farthest away from you is the back loop.
Insert your hook through that loop only.
This creates the raised ribbed texture.
Row 3
Repeat:
1 hdc BLO in every stitch across.
Chain 1.
Turn.
Continue the Brim
Repeat Row 3 until the strip reaches the desired circumference.
For an adult medium, you may need approximately:
65–75 rows
But do not depend only on row count.
Stretch the strip gently and measure it around the head.
For the best fit, make the brim approximately 1–2 inches smaller than the head circumference.
The ribbing will stretch.
Brim Length by Size
These are starting points:
Newborn
Approximately 40–45 rows.
Baby
Approximately 45–50 rows.
Toddler
Approximately 50–55 rows.
Child
Approximately 55–65 rows.
Teen
Approximately 60–70 rows.
Adult Small
Approximately 65–70 rows.
Adult Medium
Approximately 70–75 rows.
Adult Large
Approximately 75–80 rows.
Your stitch tension can change these numbers, so measuring is more reliable.
Join the Brim
Lay the two short ends together.
Make sure the rows line up.
Use slip stitches through both layers to join them.
You now have a ribbed tube.
Turn the seam toward the inside.
This is the folded brim of your hat.
Part 2: Crochet the Hat Body
Now we begin the main body.
Attach your yarn around the top edge of the ribbed brim.
Try to place your stitches evenly around the entire edge.
For an adult medium, you can begin with approximately:
72 hdc
around the brim.
The exact stitch count depends on your brim size.
Round 1
Chain 1.
Work:
1 hdc around the entire top edge.
Join with a slip stitch.
Place a stitch marker if you prefer working without joining every round.
Round 2
Chain 1.
Work:
1 hdc in every stitch around.
Join.
You should now see the hat beginning to rise above the brim.
Round 3: Create the Vertical Texture
For the textured appearance shown in the photo, use alternating regular and raised stitches.
Repeat around:
1 hdc, 1 raised hdc
How to Make a Raised HDC
Yarn over.
Insert your hook around the post of the hdc from the front.
Yarn over.
Pull up a loop.
You will have three loops on your hook.
Yarn over.
Pull through all three loops.
Your stitch will sit slightly forward from the fabric.
This creates the raised vertical lines.
Round 4
Work:
1 hdc in every stitch around.
When you reach a raised stitch from the previous round, work your next raised stitch around the same vertical area.
This keeps the lines running upward.
Rounds 5–10
Continue alternating:
Texture round: 1 hdc, 1 raised hdc
Plain round: 1 hdc in each stitch
Repeat this pattern until the body measures approximately:
4–5 inches from the top of the brim.
The hat should now look similar to the tall textured crown in the photo.
Important Tip for This Design
The raised lines should run almost straight from the brim toward the crown.
Do not move your raised stitches randomly.
Keeping them aligned is what gives this hat its clean vertical texture.
Part 3: Shape the Crown
Now we start reducing the number of stitches.
This gives the top of the hat its rounded shape.
Do not decrease too quickly.
The hat in the photo has a soft, gently curved crown.
Decrease Round 1
Repeat:
hdc in the next 6 stitches, hdc2tog
around.
Join.
What Is HDC2TOG?
HDC2TOG means half double crochet two together.
It turns two stitches into one.
To make it:
- Yarn over.
- Insert your hook into the next stitch.
- Pull up a loop.
- Insert your hook into the next stitch.
- Pull up another loop.
- Yarn over.
- Pull through all loops on the hook.
You have now decreased by one stitch.
Next Round
Work:
1 hdc in every stitch around.
Do not decrease.
This plain round helps keep the crown rounded.
Decrease Round 2
Repeat:
hdc in the next 5 stitches, hdc2tog
around.
Join.
Next Round
Work:
1 hdc in every stitch around.
Decrease Round 3
Repeat:
hdc in the next 4 stitches, hdc2tog
around.
Join.
Next Round
Work:
1 hdc in every stitch around.
Decrease Round 4
Repeat:
hdc in the next 3 stitches, hdc2tog
around.
Join.
Continue Shaping
If the crown is still wide, continue with:
2 hdc, hdc2tog
around.
Then:
1 hdc, hdc2tog
around.
Keep checking the shape as you work.
The crown should curve inward rather than form a sharp point.
Close the Crown
When approximately 8–12 stitches remain, cut the yarn.
Leave a long tail.
Thread the tail onto a yarn needle.
Weave through the remaining stitches.
Pull gently.
The opening will close.
Secure the yarn firmly on the inside.
Weave in the remaining end.
Part 4: Fold the Brim
Now fold the beige or main-color brim upward.
The brim should cover approximately 3–4 inches of the lower hat, depending on the size you made.
The ribbing should remain visible.
This creates the wide folded look shown in the photo.
You can leave the brim loose, or use a few hidden stitches to keep the fold in place.
Part 5: Add the Pom-Pom
The large fluffy pom-pom is the finishing touch.
You can use a ready-made faux-fur pom-pom or make your own yarn pom-pom.
Easy Yarn Pom-Pom
Wrap your yarn around a piece of cardboard many times.
The more you wrap, the fuller the pom-pom will become.
Carefully remove the wrapped yarn.
Tie a strong piece of yarn tightly around the center.
Cut through both sides.
Fluff the yarn.
Trim the ends until you have a round shape.
Attach the Pom-Pom
Thread the pom-pom’s long tails through the center of the hat.
Tie them securely on the inside.
For a large pom-pom, sew through several stitches rather than relying on a single knot.
This keeps the pom-pom firmly attached.
Optional: Removable Pom-Pom
If you want to wash the hat easily, attach the pom-pom with a button or snap instead of permanently sewing it on.
This allows you to remove the pom-pom before washing.
How to Make the Hat Look Like the Photo
The original design has a very soft and simple appearance.
For the closest result:
Use #3 yarn
A lightweight yarn gives the crown a delicate texture.
Use a 3.5–4 mm hook
This creates a fairly firm fabric without making the hat stiff.
Make the brim wide
The folded brim should be noticeably wider than a normal beanie brim.
Keep the crown tall
Do not start decreasing too early.
Use gradual decreases
This creates the rounded top.
Add a large fluffy pom-pom
The pom-pom should be large enough to be clearly visible but not so heavy that it pulls the crown down.
Color Ideas
Although the pictured hat uses a soft mauve color, this design looks beautiful in many shades.
Soft Winter Hat
- Dusty pink
- Cream pom-pom
Classic Neutral
- Beige
- White pom-pom
Cozy Gray
- Light gray
- White pom-pom
Blush Pink
- Rose pink
- White faux-fur pom-pom
Lavender
- Soft lavender
- White pom-pom
Chocolate
- Warm brown
- Cream pom-pom
How to Resize the Pattern
The easiest way to resize this hat is to change the length of the ribbed brim.
The brim controls the circumference.
The chain length controls the height of the brim.
The number of body rounds controls the height of the crown.
So you can easily customize:
Brim circumference → hat size
Brim chain → brim height
Body rounds → hat height
Decrease rounds → crown shape
If Your Hat Is Too Tight
If the finished hat does not stretch comfortably around the head:
- Add more rows to the brim.
- Use a slightly larger hook.
- Check your gauge.
- Make sure you are not crocheting your BLO rows too tightly.
If Your Hat Is Too Loose
Try:
- Removing a few brim rows.
- Using a smaller hook.
- Making your stitches slightly firmer.
Do not make the hat dramatically smaller because the ribbed fabric needs room to stretch.
If the Crown Looks Pointed
This usually means the decreases are happening too quickly.
Add plain hdc rounds between decrease rounds.
For this particular design, slow decreases create a much softer crown.
If the Crown Looks Too Flat
Work a few additional body rounds before beginning the decreases.
You can also make the pom-pom larger to give the finished hat more height.
If the Ribbing Does Not Stretch
Make sure you are working into the back loop only.
Also avoid pulling your yarn too tightly at the end of each row.
The brim should have plenty of natural stretch.
Finishing Checklist
Before wearing your finished hat, check:
- The brim stretches comfortably.
- The brim is folded evenly.
- The vertical texture is aligned.
- The crown is smoothly rounded.
- All loose ends are woven in.
- The pom-pom is firmly attached.
- There are no loose loops or knots inside.
Final Thoughts
This 3 weight yarn crochet hat pattern free is a simple and cozy project that creates the same basic look as the pictured hat: a wide ribbed folded brim, textured crochet crown, gentle shaping, and a fluffy pom-pom.
The lightweight #3 yarn keeps the hat soft and comfortable, while the raised vertical stitches give the crown a beautiful handmade texture. You can make it in one color, add a contrasting pom-pom, or create a whole set of hats in different shades.
For the closest match to the photo, use a dusty mauve #3 yarn, a 3.5–4 mm hook, a deep ribbed brim, gradual crown decreases, and a large white fluffy pom-pom.