Crochet Easter Cross Wall Hanging – FREE Pattern
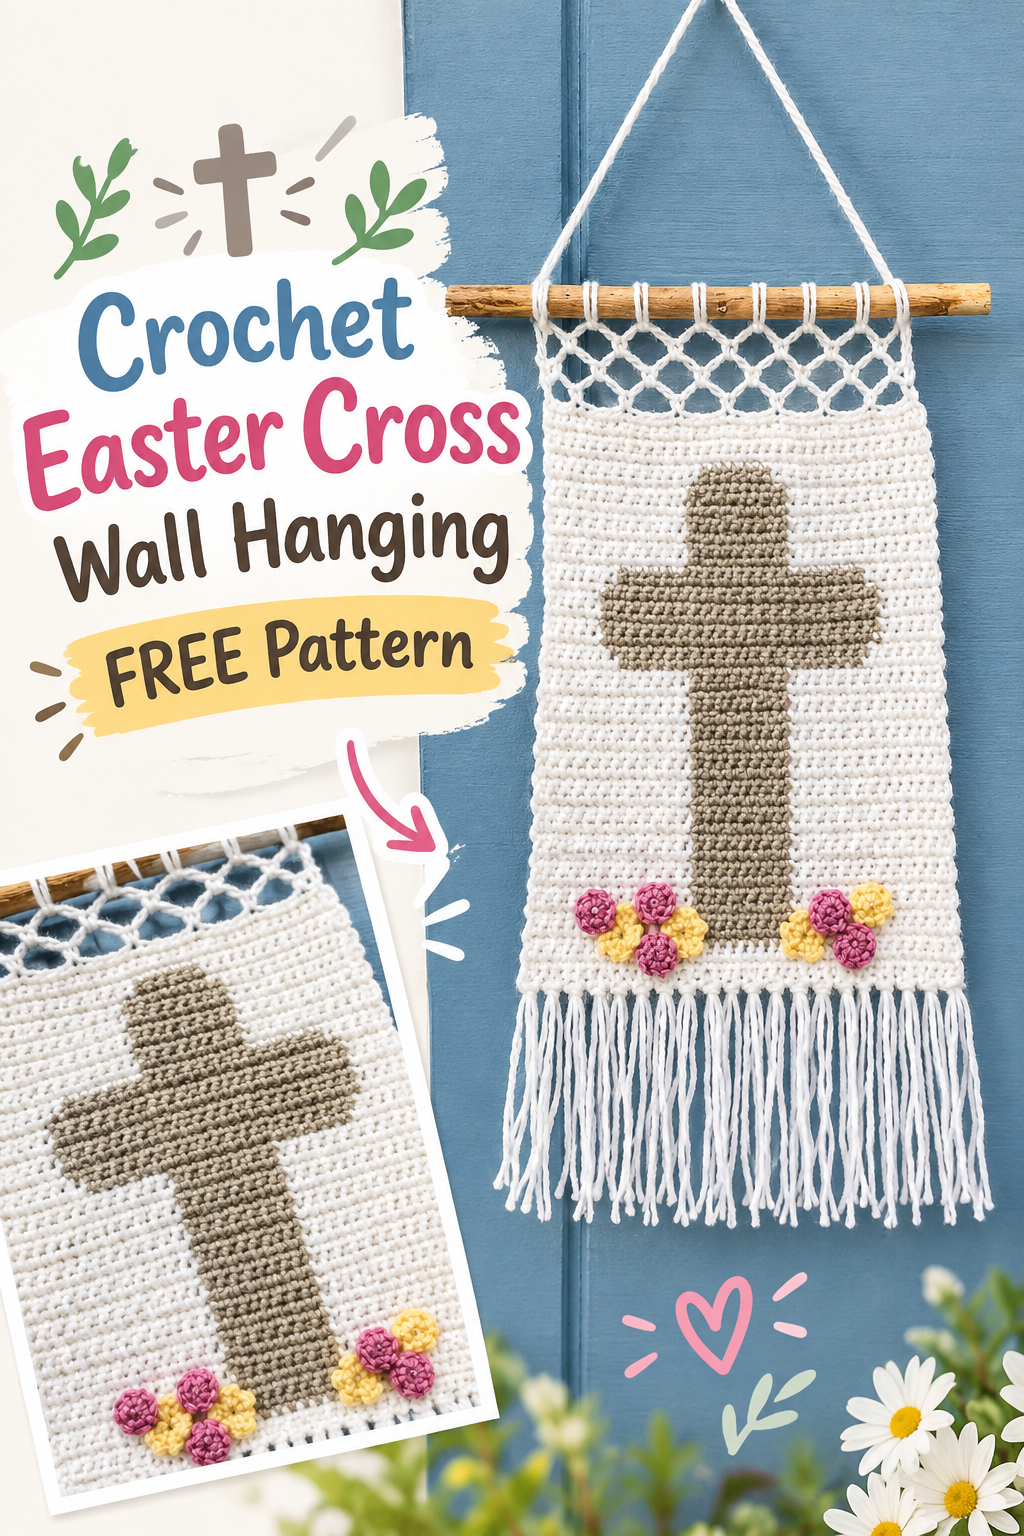
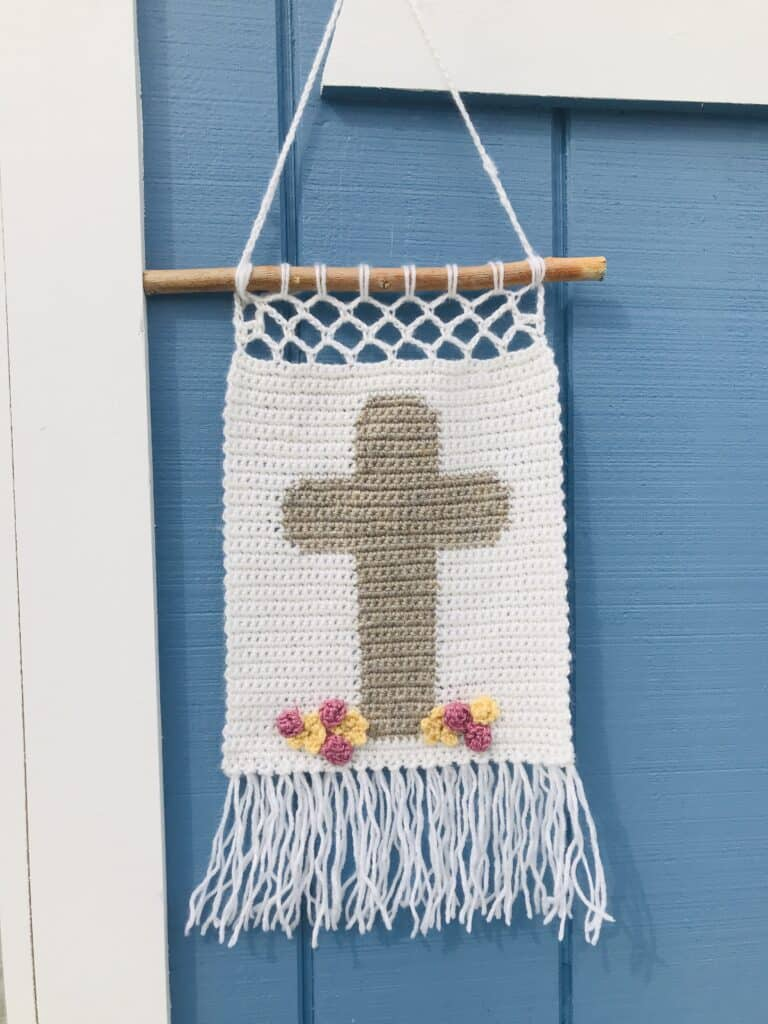
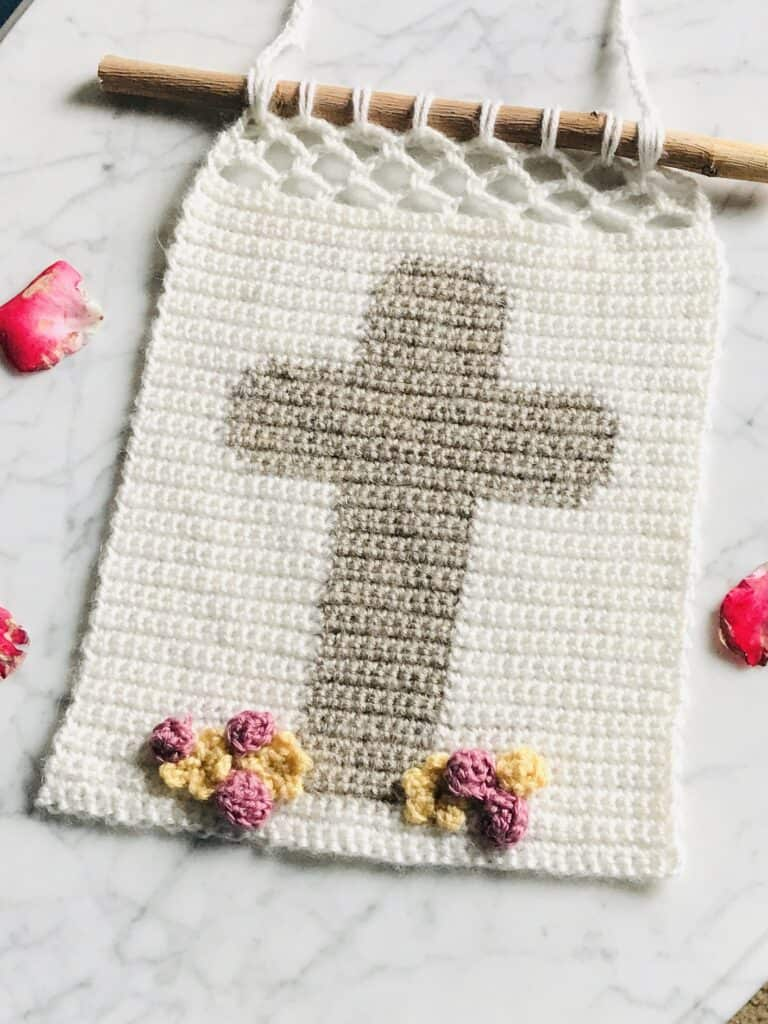
Create a beautiful reminder of the meaning of Easter with this rustic crochet cross wall hanging. This handmade decoration combines tapestry crochet, a simple cross design, delicate mesh detailing, and pretty crocheted flowers for a charming finished piece.
It makes a lovely addition to your Easter decorations and can also be displayed throughout the year as a meaningful Christian home accent.
A Faith-Inspired Crochet Project
Sometimes a design idea comes together unexpectedly. That is exactly what happened with this wall hanging.
I had been thinking about creating more crochet projects inspired by Christian faith, but I wasn’t sure what direction to take. Then, suddenly, several ideas came together at once.
Within just a couple of days, I had created three different designs based on the same inspiration: simple crochet projects that could beautifully represent the Easter message.
This cross wall hanging was one of those designs, and I’m excited to share it with you.
Tapestry Crochet Cross Design
The main body of the wall hanging features a cross created with two-color crochet.
If you haven’t tried tapestry or intarsia crochet before, this is a nice project for getting started with colorwork. Only two colors are used throughout the main design: one for the background and another for the cross.
The flowers are crocheted separately and added once the main wall hanging has been completed.
The color changes may look complicated at first, but once you understand how the two colors are carried and changed, the design becomes much easier to follow.
A Meaningful Easter Decoration
“But God demonstrates His love for us in this: while we were still sinners, Christ died for us.”
— Romans 5:8
Easter is a wonderful time to create handmade pieces that point back to the reason we celebrate.
For me, faith is an important part of everyday life, so creating Christian-inspired crochet patterns feels like a natural extension of my love for crochet.
Whether you are making crafts with your children, decorating your home, creating something for your church community, or simply enjoying a quiet crochet project, handmade Christian designs can be a meaningful way to express your faith.
I wanted this project to feel both traditional and fresh. Crochet crosses can sometimes have a very classic appearance, so this wall hanging combines the familiar cross shape with modern colors, meshwork, flowers, and a rustic wooden stick.
Should You Add Fringe?
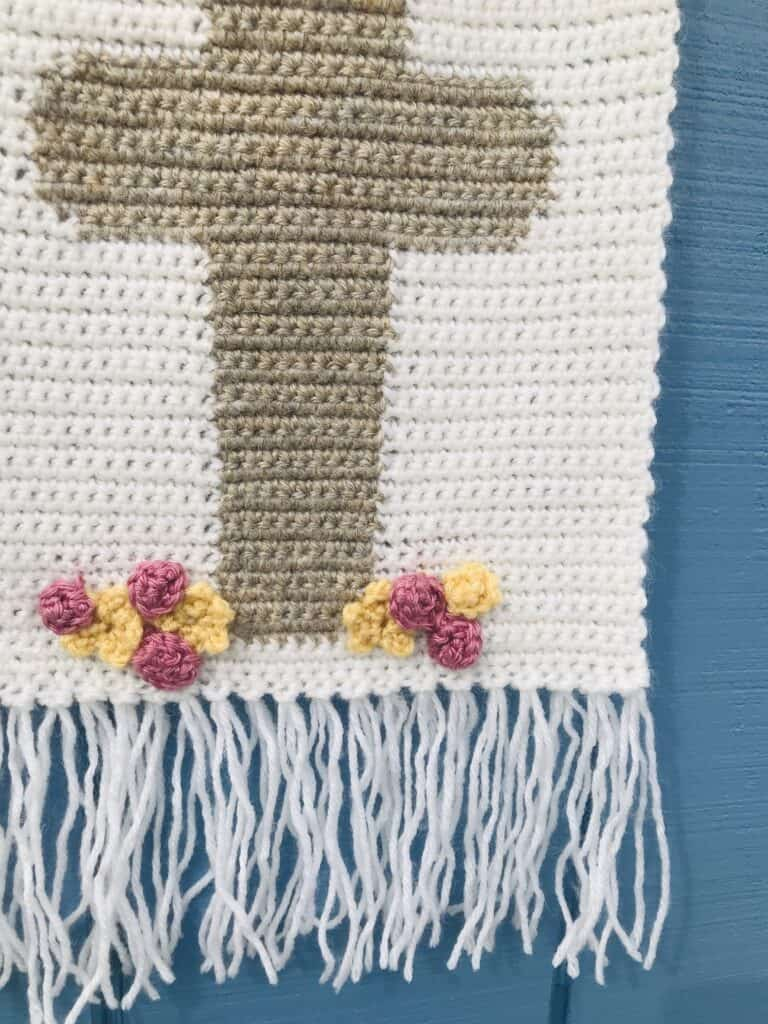
The fringe is completely optional.
I spent quite a bit of time deciding whether this design looked better with or without fringe. Both versions have their own charm, so you can choose whichever style fits your taste.
Adding fringe gives the wall hanging a softer, more boho-inspired appearance, while leaving it off creates a cleaner and simpler finish.
Video Tutorial
Prefer to learn by watching each step?
A video tutorial can be especially helpful for the colorwork and for attaching the finished crochet piece to the wooden stick.
The tutorial walks through the process so you can follow along visually while making your own wall hanging.
Ad-Free PDF Pattern
If you prefer having a printable version of the pattern without advertisements, an ad-free PDF version is also available for $3.99 on Etsy or Ravelry.
The PDF contains:
- Complete written instructions
- Two color charts for crocheters who prefer visual instructions
- A photo tutorial explaining how to attach the wall hanging to the stick
The free version below contains the complete written pattern. The additional color charts are included with the premium PDF version.
Crochet Easter Cross Wall Hanging – Free Pattern
Gather your supplies and get ready to make this faith-inspired Easter decoration.
Materials
Mary Maxim Woodlands Worsted Weight Yarn: (90% Acrylic, 10% Alpaca, 200 yds/182 m, 3.5 oz/100 g) 1 skein Ecru (MC) and 1 skein Beige Heather (CC)
Small amounts of worsted weight yarn in pink and yellow for flowers (or your desired colors)
H/5mm crochet hook
Yarn needle
Large stick a few inches longer than the finished wall hanging – you can use something like a dowel rod available at craft stores, but a clean stick from the yard will look more rustic!
Notes
Ch 1 at beginning of row does NOT count as a stitch.
Always change colors by yarning over with the NEW color on the last stitch of the current color.
You can do the color work using your desired method, but I carried the white throughout the cross. On the other hand, I dropped the brown each time I got to the white and then picked it back up again on the next row. For more information on how to do crochet color work, please see this blog post.
The color work will be written out in the following manner: (MC sc) x 17, (CC sc) x 6. In this example, you would work 1 sc in the next 17 stitches with the main color, followed by 1 sc in the next 6 stitches with the contrasting color.
Finished Measurements
Approximately 10” wide and 13” tall (includes netting but not fringe).
Abbreviations/Stitches Used (U.S.)
Chain – ch
Foundation single crochet – fsc
Slip stitch – sl st
Single crochet – sc
Repeat – rep
Skip – sk
Space(s) – sp(s)
Stitch(es) – st(s)
Beginning – beg
Main color – MC
Contrasting color – CC
Instructions
Main Wall Hanging
With MC, fsc 40.
← Row 1 [RS]: Ch 1, (MC sc) x 40. Turn.
→ Row 2 [WS]: Ch 1, (MC sc) x 40. Turn.
← Row 3 [RS]: Ch 1, (MC sc) x 17, (CC sc) x 6, (MC sc) x 17. Turn.
→ Row 4 [WS]: Ch 1, (MC sc) x 16, (CC sc) x 8, (MC sc) x 16. Turn.
Rows 5-27: Ch 1, (MC sc) x 15, (CC sc) x 10, (MC sc) x 15. Turn.
→ Row 28 [WS]: Ch 1, (MC sc) x 8, (CC sc) x 24, (MC sc) x 8. Turn.
← Row 29 [RS]: Ch 1, (MC sc) x 7, (CC sc) x 26, (MC sc) x 7. Turn.
Rows 30-34: Ch 1, (MC sc) x 6, (CC sc) x 28, (MC sc) x 6. Turn.
← Row 35 [RS]: Ch 1, (MC sc) x 7, (CC sc) x 26, (MC sc) x 7. Turn.
→ Row 36 [WS]: Ch 1, (MC sc) x 8, (CC sc) x 24, (MC sc) x 8. Turn.
Rows 37-44: Ch 1, (MC sc) x 15, (CC sc) x 10, (MC sc) x 15. Turn.
← Row 45 [RS]: Ch 1, (MC sc) x 16, (CC sc) x 8, (MC sc) x 16. Turn.
→ Row 46 [WS]: Ch 1, (MC sc) x 17, (CC sc) x 6, (MC sc) x 17. Turn.
← Row 47 [RS]: Ch 1, (MC sc) x 40. Turn.
→ Row 48 [WS]: Ch 1, (MC sc) x 40. Turn.
← Row 49 [RS]: Ch 1, (MC sc) x 40. Turn.
→ Row 50 [WS]: Ch 1, (MC sc) x 40. Turn.
Edging
Row 51: Ch 1, sc in first sc. (Ch 5, sk 4 sc, sc in next sc) 6 times. Ch 5, sk 3 sc, sc in next sc. Ch 5, sk 4 sc, sc in last sc. Turn.
Row 52: Ch 1, sc in first sc. Ch 3, sc in first ch-5 sp. (Ch 5, sc in next ch-5 sp) 7 times. Ch 3, sc in last sc. Turn.
Row 53: Ch 1, sc in first sc. Ch 5, sk ch-3 sp, sc in ch-5 sp. (Ch 5, sc in next ch-5 sp) 6 times. Ch 5, sk ch-3 sp, sc in last sc. Turn.
Next Step
Do not fasten off.
Steam block your wall hanging to get rid of any curling. I recommend doing this before the next row where we attach it to the stick – so that the stick doesn’t get wet from the steam. Here’s what mine looked like pinned out ready to block.
After blocking is finished, pick up your loop again to start Row 54, where we will attach the wall hanging to the stick.
Row 54: Ch 3. Insert hook into next ch-5 sp. We are now going to create a sc over the stick. Place the stick over on top of your hook, and bring the yarn over the stick. Yarn over.
Pull up a loop, just as if you were making a regular sc. YO, pull through 2 loops to finish your first sc around the stick. Ch 5.
Repeat the same exact process in each ch-5 loop.
From the front, you won’t be able to see the ch-5 sp. Fasten off when you get to the end of the ch-5 sps.
Note: if you need visual help with this row, please see the video tutorial or ad-free PDF.
Handle
Make a slip knot. Make another single crochet through the ch-5 sp on the right side and around the stick. It is important that you actually join NEW yarn here. This will prevent the netting from pulling toward the center.
Chain 65 (or whatever amount of chains you want for your handle). Make another sc through the ch-5 on the left side and around the stick. Fasten off.
Flowers
Large Rose
Ch 7. Make 3 sc in the second ch from hook. 3 sc in each ch across. Allow the stitches to twist naturally into a flower. (18 sc)
To finish, sl st to the side of the flower where the ending stitch lines up. Fasten off.
Small Rose
Ch 5. Make 3 sc in the second ch from hook. 3 sc in each ch across. Allow the stitches to twist naturally into a flower. (12 sc)
To finish, sl st to the side of the flower where the ending stitch lines up. Fasten off.
Daisy
Ch 6. Sl st in 6th ch from hook. (Ch 5, sl st in same ch) 4 times. Fasten off.
You can make as many or as few of the above flowers as you would like. I attached 2 daisies, 2 small roses, and 1 large rose on the left of the cross. And 1 daisy, 2 small roses, and one large rose on the right side.
Finishing
Weave in all ends.
Attach flowers on the left and right side of cross. Just arrange the flowers according to the photo below (or however you would like) then sew down securely.
Add fringe to the bottom if desired. My fringe was 11” long and I used 2 strands of yarn for each set (once folded in half for the fringe it looks like 4 strands per set, and the measurement will be half of the original 11” measurement). If you’re unfamiliar with how to add fringe with this method, please check out this video.
Final Thoughts
I hope you enjoy making this Easter cross wall hanging as much as I enjoyed designing it.
It’s a lovely project for adding handmade character to your Easter decorating, and the cross makes it especially meaningful as a reminder of the reason behind the season.
You can display it in your home, give it as a handmade gift, or make one for a church or Bible study space.
For more crochet home décor projects, explore the rest of the collection.
Share Your Crochet
If you enjoyed this free crochet pattern, sharing it helps other crocheters discover the project too.
You can save it to Pinterest for later, tag your finished project on Instagram, or share your photos with your crochet community.
Happy crocheting!