Crochet Octopus Hat Pattern – Cute Handmade Octopus Beanie for Kids
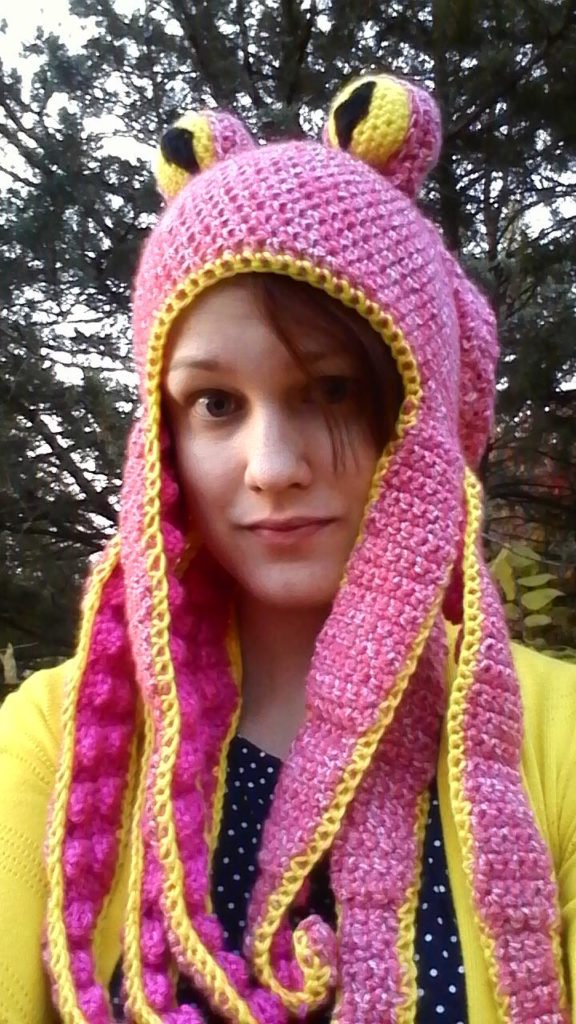
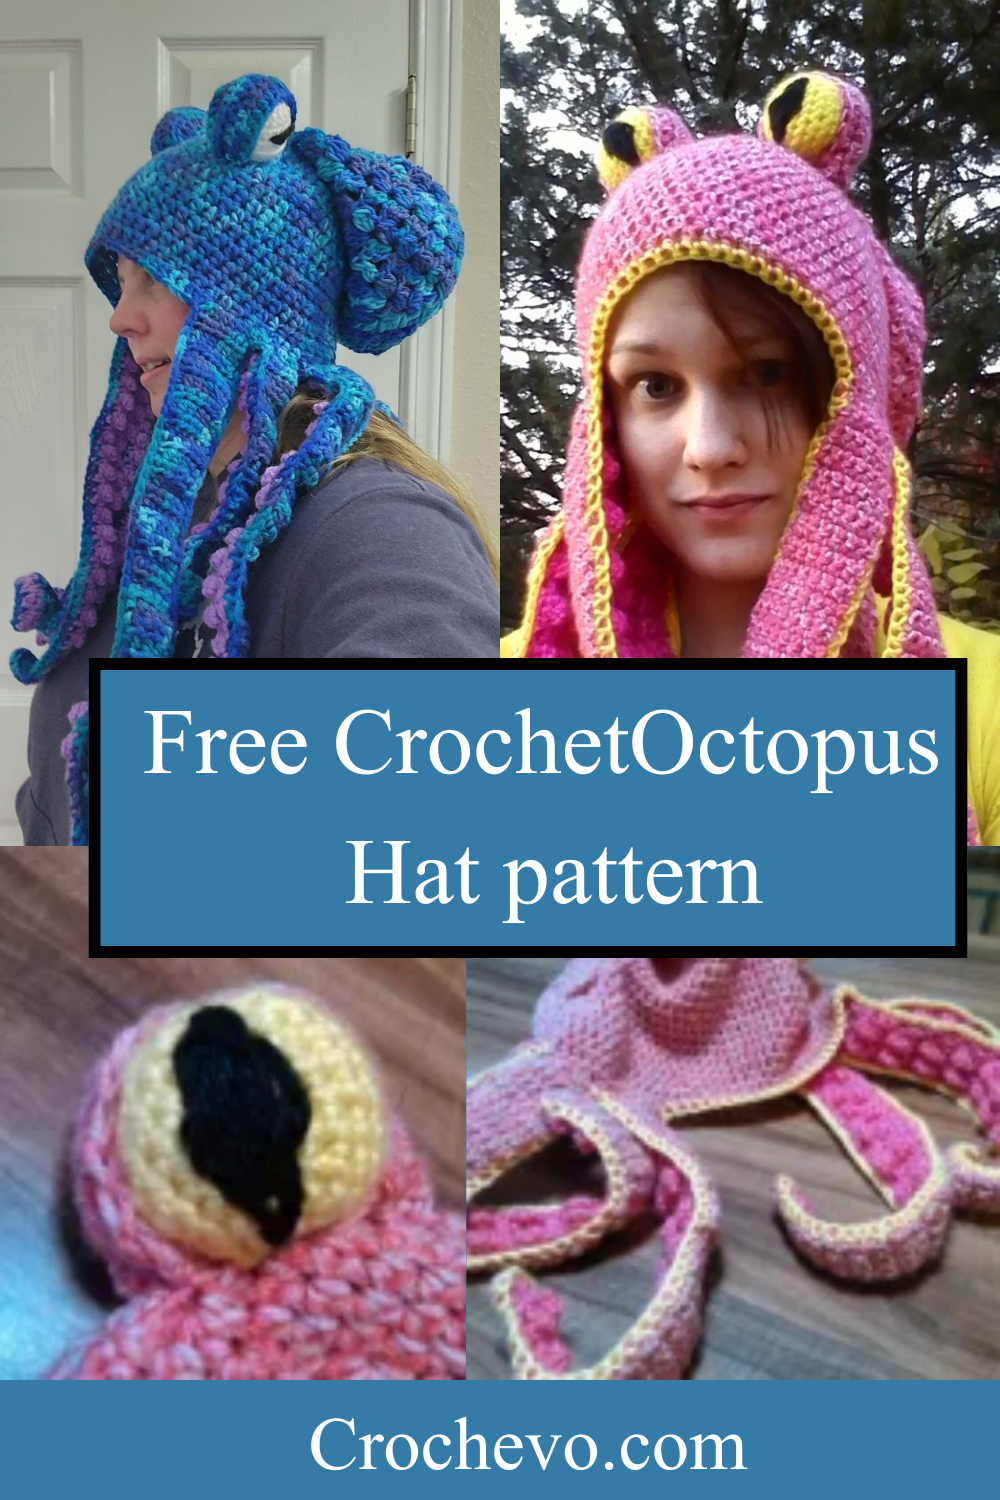
The idea for this crochet octopus hat started when I discovered a photo of an adorable octopus hat on Reddit. Crochet enthusiasts tracked down the original creator, Natalie Allen, through her Pinterest page, but no official pattern was available. Inspired by the design, I took on the challenge of recreating this fun and unique crochet octopus hat. The result is my own handmade version shown above.Below is an easy-to-follow, beginner-friendly pattern that includes a few helpful references to additional crochet instructions.
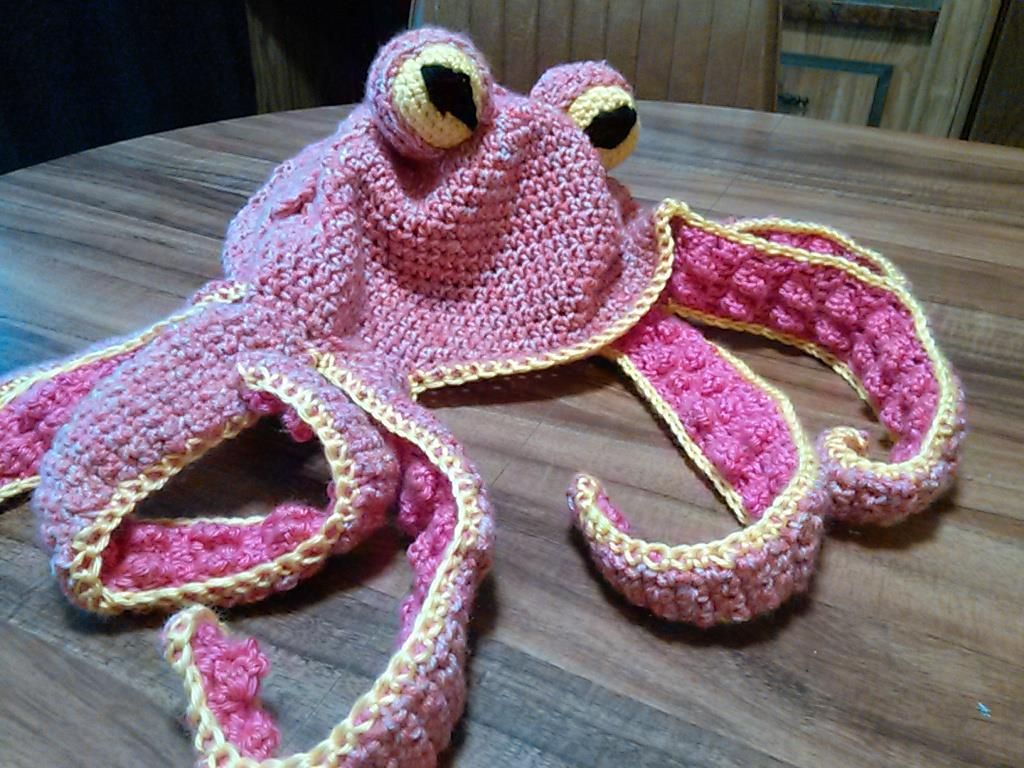
The Materials
Yarn Supplies:
- 2 skeins of “I Love This Yarn!” – Coraline Stonewash (for the main body)
- Less than 1 skein of “Caron Simply Soft – Fuchsia” (for the inside of the tentacles)
- Less than 1 skein of “Caron Simply Soft Brites – Super Duper Yellow” (for the eyes and edging)
- A small amount of “Caron Simply Soft – Black” (for the pupils)
I don’t have the exact yardage used since I selected coordinating colors from my yarn stash to match the main body. Any worsted weight yarn will work well for this project, so feel free to choose colors that complement your design.
The Hat and Back of the Head
For this crochet octopus hat, I blended a few existing hat designs to create the finished look.The beanie base was adapted from a free pattern by Oombawka Designs. I made mine in the Adult Medium size, as it provides a great fit and works up quickly. If you choose a different beanie size, remember to adjust the tentacle width to match.
For the back of the head, I used the hat portion of the Rosy Shells Hat & Scarf Set found on Ravelry. This pattern is simple, quick to make, and adds a beautiful textured detail to the design.
To assemble the pieces, I stitched the Rosy Shells section onto the back of the beanie, positioning it so the top edge covered the original starting ring. The combination of both patterns created the perfect base for the finished octopus hat design.
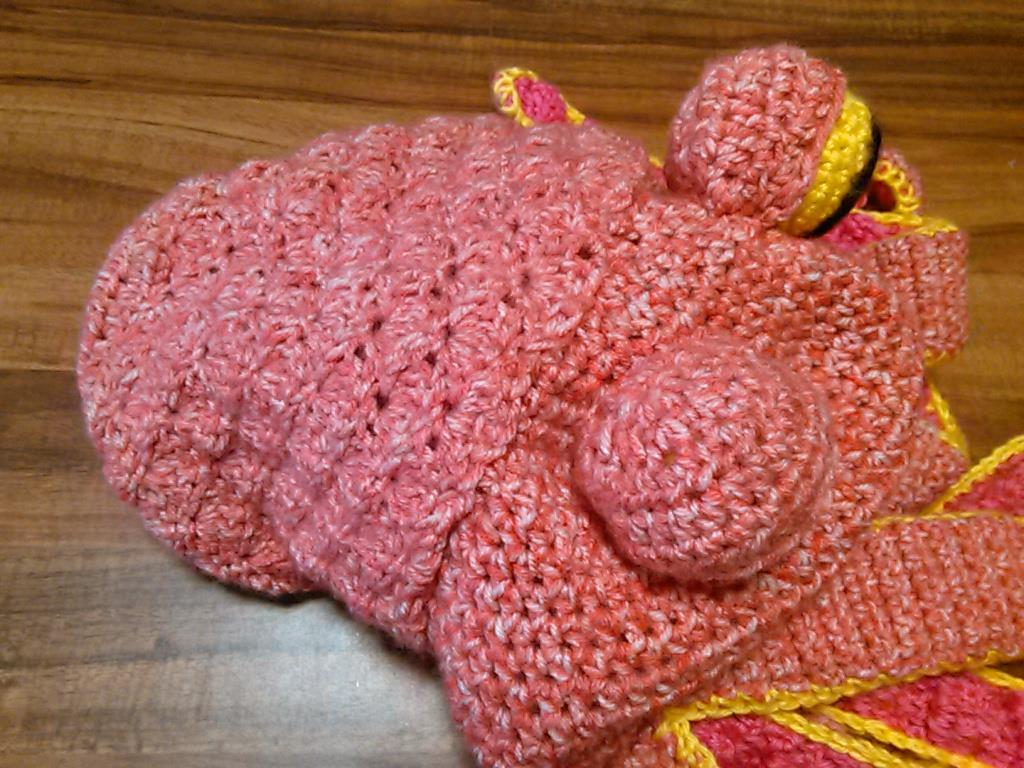
The Eyes
The Eyeballs
Make 2 using your chosen eyeball color (yellow in my case).
- Create a magic loop and work 6 single crochets (sc) into the loop. (6)
- Starting in the first stitch, work 2 sc in each stitch around. (12)
- 2 sc in the first stitch, sc in the next stitch; repeat around. (18)
- 2 sc in the first stitch, sc in the next 2 stitches; repeat around. (24)
- Sc around. (24)
- Sc around. (24)
- Sc around. (24)
- Sc around. (24)
- Decrease in the first stitch, sc in the next 2 stitches; repeat around. (18)
- Decrease in the first stitch, sc in the next stitch; repeat around. (12)
- Stuff the eyeball at this stage. Continue decreasing until the opening is fully closed. There’s no need to worry about making the closure perfect, as both the starting and finishing points will be covered in the final design.
The Pupil
Using black yarn (or your preferred color), thread a yarn needle and stitch a simple diamond or slit-shaped pupil onto the eye. Secure both ends by tying knots, then weave the yarn tails through the stuffing to hide them. Trim any excess yarn for a clean finish.
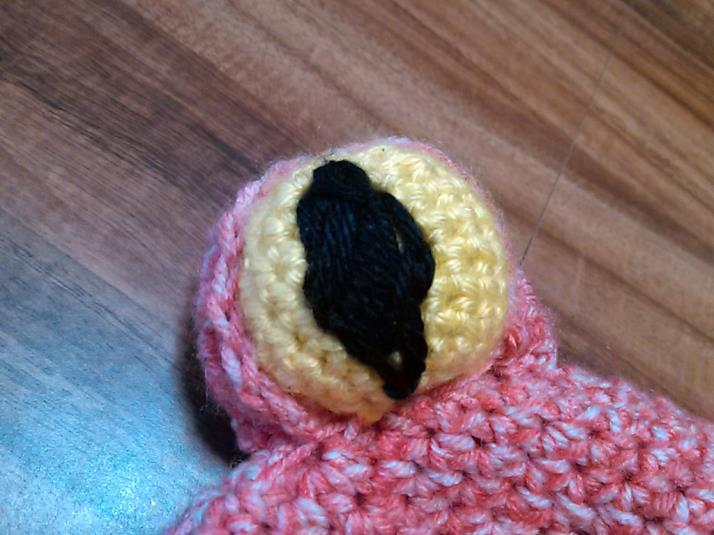
The Eyelid
Make 2 using the same color as the main body.
Create a chain of 4 stitches. Work a single crochet (sc) into the last chain from the hook to form a loop.
- Chain 2 (This chain does not count as a stitch.) Work 6 half double crochets (hdc) into the loop. Turn.
- Chain 2. Work 2 hdc in each stitch across. (12) Turn.
- Chain 2. Work 2 hdc in the first stitch, then 1 hdc in the next stitch across. (18) Turn.
- Work hdc across. (18) Turn.
- Work hdc across. (18) Turn.
- Work hdc across. (18) Turn.
- Chain 2. Work single crochet (sc) evenly around the straight edge created by your turning rows to give it a clean finish. Fasten off, leaving a long yarn tail for sewing.
Assembly
Take the completed eye and eyelid pieces. Begin by attaching the eyelid to the eye, sewing along the curved edge of the eyelid.
Using the long yarn tail, insert your needle into the desired starting point, pass it through the eye piece, and bring it out on the opposite side. Then insert it again one stitch above the previous stitch. Continue sewing in this manner until the eyelid is securely attached.
Once the eyelid is firmly in place, sew the completed eye piece onto the main hat body.
The Tentacles
You will be making 16 tentacles in total—8 in the main color and 8 in the contrasting color. The inside-color tentacles feature popcorn stitches to create the look of suction cups.
Tentacles #1–8
Using the main body color, make 8 tentacles.
- Chain 8. Single crochet (sc) in the second chain from the hook, then sc across. (7)
- Sc across for rows 2–25. (7)
- Chain 1. Decrease, sc in the next 3 stitches, then decrease again to finish the row. (5)
- Sc across for rows 27–39. (5)
- Decrease, sc in the next stitch, then decrease again to finish the row. (3)
- Sc across for rows 41–62. (3)
Fasten off.
Tentacles #9–16 (Popcorn Tentacles)
Using the inside tentacle color, make 8 tentacles. These tentacles feature popcorn stitches to create the suction cup texture.
- Chain 8. Single crochet (sc) in the second chain from the hook, then sc across. (7)
- Chain 3. Double crochet (dc) in the next stitch. Make a popcorn stitch (4 dc in one stitch. Remove the hook, insert it front to back through the top of the first dc, grab the loop, and pull it through). Dc in the next stitch, popcorn stitch, then dc in the next 2 stitches. Turn. (7)
- Chain 3. Dc across. (7)
- Repeat Row 2.
- Repeat Row 3.
- Repeat Row 2.
- Repeat Row 3.
- Repeat Row 3.
- Repeat Row 3.
- Repeat Row 2.
- Repeat Row 3.
- Repeat Row 2.
- Slip stitch to the second dc. Chain 3, then dc across. (5)
- Chain 3. Popcorn stitch in the next stitch, dc, popcorn stitch, then dc to finish the row. (5)
- Chain 3. Dc across. (5)
- Repeat Row 15.
- Repeat Row 16.
- Repeat Row 15.
- Slip stitch to the second dc. Chain 3, then dc across. (3)
- Chain 3. Make a popcorn stitch in the next stitch, then dc to finish the row. (3)
- Chain 3. Dc across. (3)
- Repeat Row 21.
- Repeat Row 21.
Fasten off and weave in ends.
- Repeat Row 20.
- Repeat Row 21.
- Repeat Row 20.
- Repeat Row 21.
Fasten off. Make 7 more popcorn tentacles for a total of 8.
Assembly
Pair one inside tentacle with one outside tentacle. Begin by positioning the tentacles where you want them on the hat and secure them in place. I used clothespins, but any clips or pins will work. Make sure the placement is even and symmetrical around where the face will be attached.
Using the main body yarn color, sew the tentacles and hat together by stitching through the starting chains of the tentacles. Secure both sides of each tentacle to the hat at the same time for a stronger attachment.
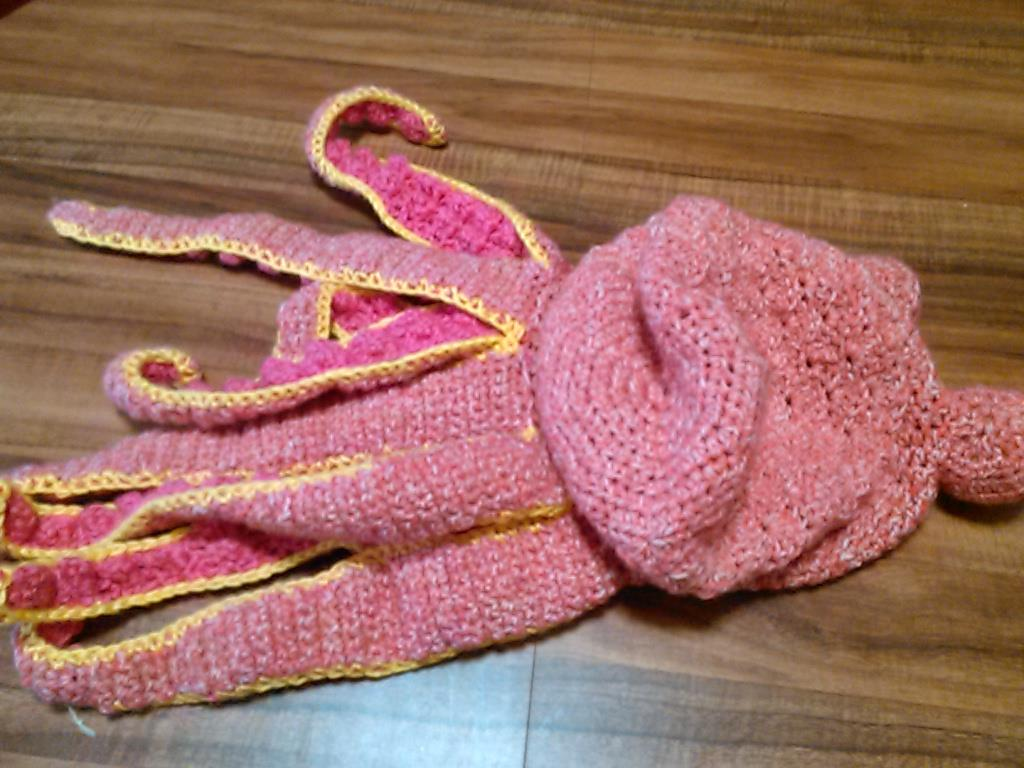
Next, using the edging color, single crochet around each tentacle to join the front and back pieces together, creating a neat finished edge.
You’re Finished!
Congratulations, your crochet octopus hat is complete! I hope you enjoyed creating this fun and unique project.
If you have any questions or run into trouble with the pattern, feel free to reach out to me on Ravelry (which I check occasionally) or Reddit (where I’m more active).