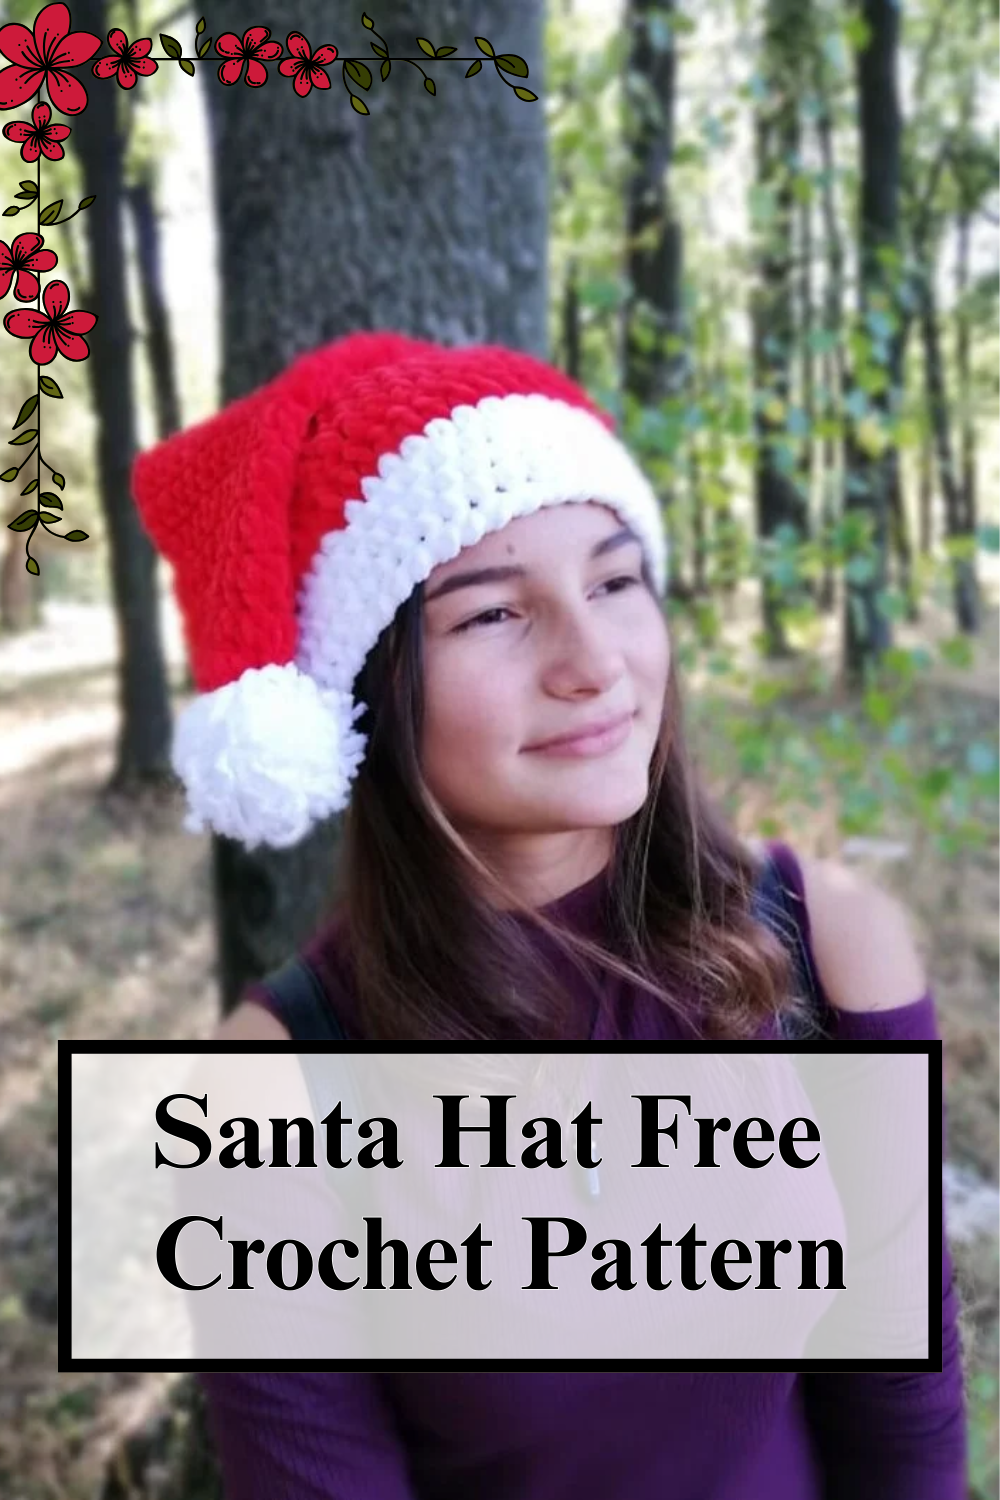
Santa Hat Crochet Hat Pattern for a Festive Holiday Look
Bring a little extra magic to your holiday celebrations with this Santa Hat Crochet Hat Pattern. A handmade winter accessory that adds a cozy, festive touch to holiday outfits, Christmas parties, and family gatherings.
Some handmade pieces have a special way of creating beautiful holiday memories, and this crochet Santa hat is one of them. With its classic red body, fluffy white trim, and adorable pom-pom finish, it captures the traditional Christmas feeling we all love. Soft, warm, and full of festive charm, this handmade hat is a fun project that brings creativity and holiday spirit together.
Cozy Crochet Santa Hat That Everyone Will Love
The best part about this Crochet Christmas Santa Hat Pattern is how simple yet adorable it is. Its timeless design makes it suitable for babies, toddlers, children, and adults, allowing the whole family to enjoy matching holiday accessories. You can easily personalize it by changing yarn textures, adding extra details, or creating different pom-pom styles.
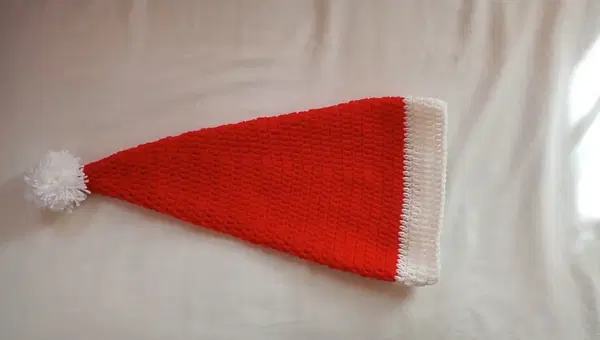
Whether you are preparing for a Christmas photoshoot, decorating for a holiday party, or making a thoughtful handmade gift, this Santa hat is a wonderful crochet project to try. The lightweight design keeps it comfortable to wear, while the soft yarn provides warmth during chilly winter days.
More than just a seasonal accessory, this crochet Santa hat represents happiness, creativity, and the little handmade touches that make Christmas special. A simple handmade project that brings festive charm, spreads smiles, and adds a special touch to the holiday season.
Materials Needed for Crochet Christmas Santa Hat
Before starting your Crochet Christmas Santa Hat Pattern, gather all the supplies you need. Choosing soft, comfortable yarn will help create a cozy hat that looks beautiful and feels comfortable to wear throughout the holiday season.
Yarn and Supplies
- Yarn
- Red yarn: Used for the main body of the Santa hat to create the classic Christmas look.
- White yarn: Needed for the fluffy brim and the pom-pom detail at the top of the hat.
- Crochet Hook
- 3.5 mm crochet hook for creating the entire Santa hat.
- Additional Tools
- Sharp scissors for trimming yarn.
- Yarn needle for weaving in loose ends and attaching finishing details.
- Pom-Pom Maker (Optional)
- A pom-pom maker can make the finishing pom-pom easier, but you can also create one by hand using yarn and simple techniques.
Special Features of This Crochet Santa Hat Pattern
1. Adjustable Sizes for Everyone
This pattern can be customized to fit different head sizes, from tiny newborns and toddlers to children and adults. Simply adjust the number of rounds to create the perfect comfortable fit.
2. Traditional Christmas Style
The combination of bright red yarn, soft white edging, and a fluffy pom-pom gives this hat the classic Santa-inspired appearance that makes it perfect for holiday celebrations.
3. Beginner-Friendly Crochet Design
The pattern uses simple crochet techniques with repeated increase rounds and regular double crochet stitches. This makes it a great project for beginners who want to create a festive handmade accessory.
4. Quick and Enjoyable Project
This Santa hat works up quickly, making it a wonderful choice for last-minute holiday gifts, family matching sets, or handmade decorations. You can easily make several hats for loved ones during the Christmas season.
Step-by-Step Crochet Christmas Santa Hat Instructions
Follow these easy steps to create your own cozy and festive Crochet Christmas Santa Hat Pattern. The hat is worked from the top down, beginning with a magic ring and gradually increasing to create the classic Santa hat shape.
Step 1: Create the Magic Ring (Round 1)
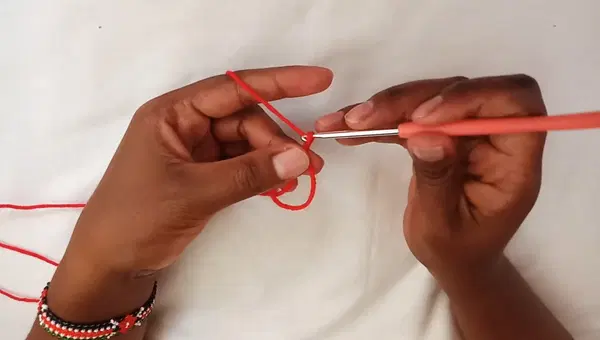
Start with your red yarn and create a magic ring.
Making the First Round:
- Wrap the yarn around your fingers and pull through a loop to form the magic ring.
- Chain 2 (this chain counts as your first double crochet).
- Work 8 double crochet (DC) stitches into the magic ring, including the beginning chain.
- Pull the yarn tail gently to close the center of the ring.
- Join the round with a slip stitch at the top of the starting chain.
Your first round creates the small top section of the Santa hat.
Step 2: Shape the Hat with Increases (Round 2)
Continue building the hat by adding increases to create the cone shape.
Increase Round:
- Chain 2 (counts as the first double crochet).
- Work 2 double crochets into the next stitch to create an increase.
- Continue alternating between 1 double crochet in the next stitch and 2 double crochets in the following stitch.
- Repeat this pattern around the entire round.
- Finish the round by joining with a slip stitch.
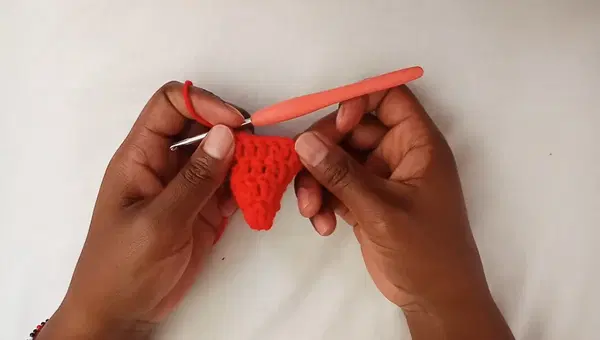
These increases help expand the hat evenly while maintaining the pointed Santa hat shape.
Step 3: Continue with Increase and Straight Rows
To create the proper size and shape, continue working a combination of increase rounds and regular double crochet rounds.
Working the Pattern:
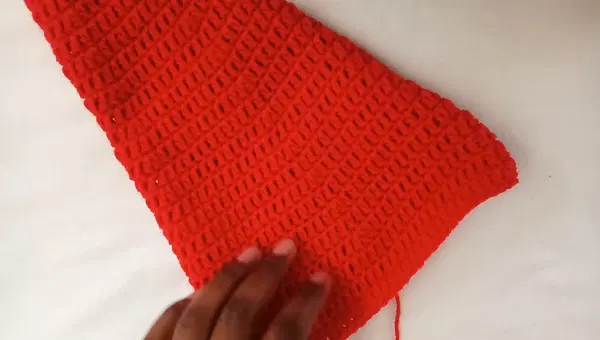
- Begin each round with chain 2.
- Work 1 double crochet into each stitch around for regular rows.
- After every increase round, add one extra double crochet between increases.
For example:
- Round 2: 1 DC between each increase.
- Round 4: 2 DC between each increase.
- Round 6: 3 DC between each increase.
- Continue increasing in the same way as the hat grows.
The alternating increase and straight rows help create a smooth, even Santa hat shape.
Adjusting the Hat Size:
- Continue increasing until the crown reaches the desired width.
- Measure the hat against the wearer’s head as you work.
- Stop increasing once you achieve the correct circumference.
For this tutorial, the hat is continued until there are 15 double crochets between increases.
Step 4: Finish the Main Hat Body
Once you have reached the correct crown size, complete the lower section of the Santa hat.
Creating the Body:
- Continue working regular rounds of double crochet without any increases.
- Crochet 3 additional rows to add length and create the main body of the hat.
- Finish the round by joining with a slip stitch.
- Chain 1 and cut the red yarn.
- Secure the yarn end and weave it neatly into the stitches.
The red portion of your Santa hat is now complete and ready for the fluffy white trim.
Step 5: Add the White Crochet Brim
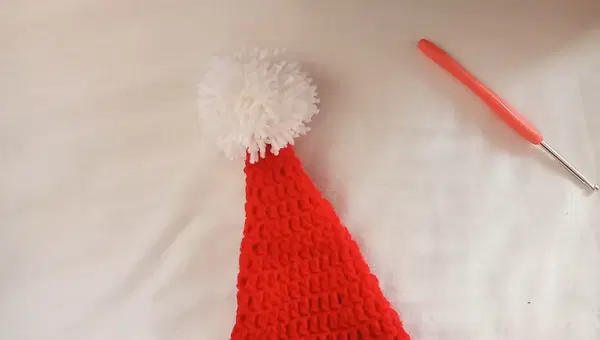
Now it’s time to complete your Crochet Christmas Santa Hat Pattern by adding the soft white brim. This fluffy border gives the hat its classic Santa-inspired finish and makes it look extra cozy.
Attach the White Yarn:
- Switch from red yarn to white yarn.
- Create a slip knot and attach the white yarn to the bottom edge of the hat.
Crochet the Brim:
- Chain 2 to begin the round.
- Work double crochet (DC) stitches into every stitch around the bottom edge of the hat.
- Continue working for 3–4 rounds until the brim reaches your preferred width and thickness.
Finish the Brim:
- Finish the round by joining with a slip stitch.
- Fasten off the yarn.
- Use a yarn needle to weave in and hide all loose ends neatly.
The fluffy white brim adds the perfect finishing touch and gives your handmade Santa hat a traditional holiday look.
Step 6: Create and Attach the White Pom-Pom
No Santa hat is complete without a cute fluffy pom-pom on top!
Make the Pom-Pom:
- Use a pom-pom maker or create one by wrapping white yarn around your fingers or a piece of cardboard.
- Tie the center securely with yarn.
- Cut through the loops and trim the edges until you have a soft, round pom-pom.
Attach the Pom-Pom:
- Use your yarn needle to sew the pom-pom firmly onto the pointed top of the hat.
- Make sure it is attached securely so it stays in place while wearing.
Final Touch:
- Weave in any remaining yarn tails.
- Gently shape the hat and pom-pom to give it a neat and festive appearance.
Helpful Tips for Making the Perfect Crochet Santa Hat
1. Choose Comfortable Yarn
For the best results, use soft yarn with a little flexibility. This will help the hat feel cozy and comfortable while keeping its shape.
2. Make a Fuller Pom-Pom
If you want a more traditional fluffy Santa look, add extra layers of yarn when creating your pom-pom. A thicker pom-pom will make the hat look more playful and festive.
3. Check the Size as You Crochet
Measure the hat while working to make sure it fits correctly. Everyone’s crochet tension is different, so adjusting as you go will help you achieve the perfect fit.
Skill Level
Beginner to Intermediate
This Crochet Christmas Santa Hat Pattern is suitable for crocheters who know basic stitches such as the magic ring, double crochet, and slip stitch. The main technique to focus on is keeping the increase rounds even to create the correct shape.
Ways to Use Your Crochet Santa Hat
This handmade holiday hat is perfect for many festive occasions:
- Wear it as a Christmas party accessory.
- Use it for holiday photoshoots and family pictures.
- Create matching hats for family members.
- Gift it as a handmade Christmas present.
- Add it to holiday outfits for children’s school events or celebrations.
Helpful Tip for Crochet Success
To create a smooth and professional-looking Santa hat, always count your stitches at the end of each round. Keeping track of your increases will help prevent uneven shaping and ensure your hat maintains its classic pointed design.
Conclusion
Making this Santa Hat Crochet Hat Pattern is a wonderful way to enjoy the holiday season with a handmade project full of charm. With its classic red-and-white colors, cozy design, and customizable sizing, this hat is a fun creation for crocheters of all skill levels.
Whether you are making it for yourself, preparing gifts for loved ones, or creating festive accessories for the whole family, this crochet Santa hat is sure to bring warmth, smiles, and Christmas cheer. A simple handmade piece like this can become a special holiday memory that you’ll enjoy for years to come.