Crochet Duck Hat Pattern – Cute Duck Beanie Pattern for Kids
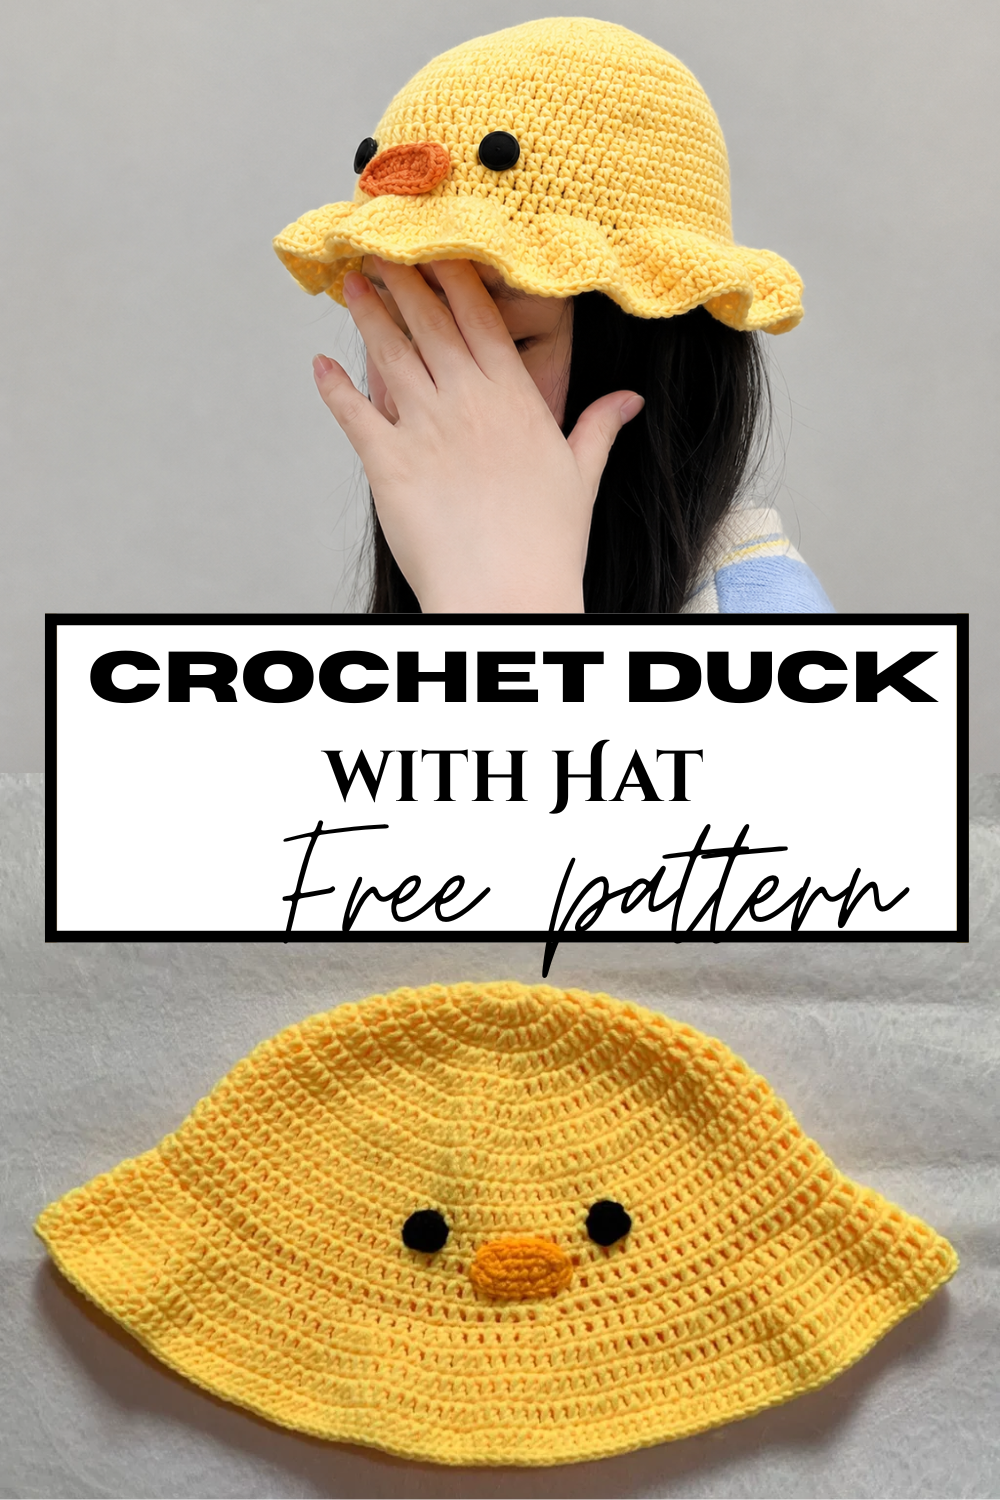
I absolutely love how cute and playful this Crochet Duck Hat Pattern turned out! It’s a fun handmade project that adds a sweet touch to any little one’s outfit while keeping them warm and cozy. With its adorable duckbill detail and charming design, this crochet hat makes a perfect gift for babies, toddlers, or anyone who loves unique handmade accessories. Grab your favorite yarn colors and enjoy creating this lovely Crochet Duck Hat Pattern with your own personal touch.
Materials Needed
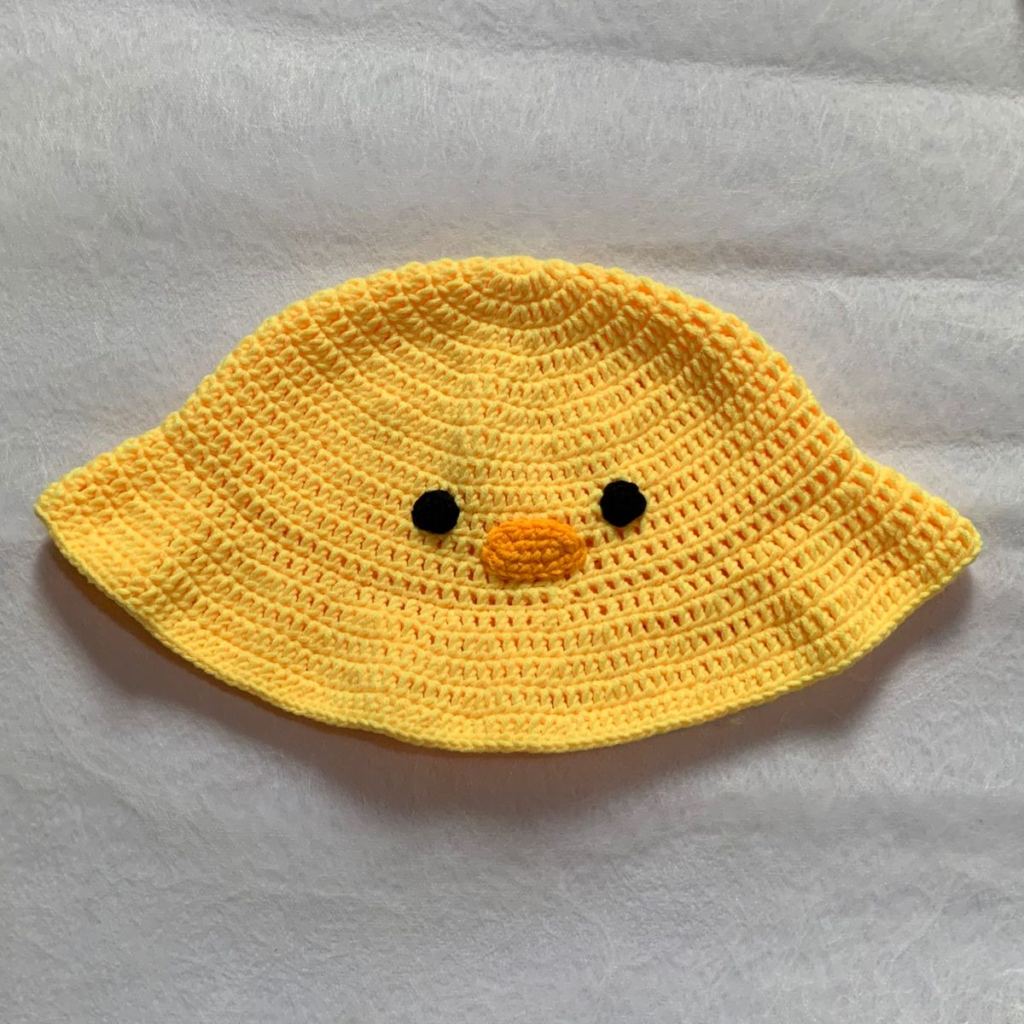
To create this adorable crochet duck hat, you will need the following supplies:
- DK weight yarn: I used 5-ply milk cotton yarn.
- Yellow yarn (#4): Approximately 50g–100g depending on the size you make.
- Orange yarn (#64): se less than 10g of yarn in orange for crocheting the duckbill detail.
- Crochet hooks: 4 mm hook for the main hat and 3.5 mm hook for the duckbill.
- Small black buttons: Two pieces measuring around 1 cm (or smaller) for the duck’s eyes.
- Stitch markers
- Tapestry needle
- Scissors
- Black sewing thread and sewing needle
- Measuring tape to check the finished hat size
Crochet Abbreviations
The pattern uses standard US crochet terminology:
- ST / STS – Stitch / Stitches
- CH – Chain
- SL ST – Slip Stitch
- HDC – Half Double Crochet
- SC – Single Crochet
- FLO – Front Loop Only
- MR – Magic Ring
Skill Level
Advanced Beginner / Easy
This crochet duck hat pattern is suitable for crocheters who are comfortable with basic stitches and simple shaping techniques.
Gauge
Gauge using a 4 mm crochet hook:
- 6 rows and 7 half double crochet stitches = 2 x 2 inches (5 x 5 cm)
Gauge is important because every crocheter’s tension is different. If your measurements do not match the gauge, adjust your hook size or yarn thickness. You can also slightly loosen or tighten your tension to achieve the correct size.
Taking a few minutes to make a gauge swatch will help ensure your finished hat fits properly.
Pattern Notes
- Choose the hat size that matches your head measurement most closely.
- Beginning chains are not included in the stitch count.
- At the end of each round, join the first stitch of the round with a slip stitch.
- The number shown in parentheses at the end of each round indicates the total stitch count.
- Any instructions marked with an asterisk (*) should be repeated until the end of the round.
- Checking your gauge before starting is recommended to achieve the correct hat size.
- The finished hat should have a comfortable fit—not too loose and not too tight.
Crochet Duck Hat Size Chart
| Size | Head Circumference | Hat Circumference | Crown Diameter | Hat Length (excluding brim) |
|---|---|---|---|---|
| Baby | 14–16 inches | 16 inches | 5.5 inches | 5 inches |
| Toddler | 17–18 inches | 18 inches | 6 inches | 5.5 inches |
| Child/Teen | 19–21 inches | 20.5 inches | 6 inches | 6 inches |
| Adult | 22–23 inches | 22.8 inches | 6 inches | 6.5 inches |
The measurements in this chart are based on average head sizes for each age group. Always choose the size that is closest to your own head measurement for the best fit.
Crochet Hat Body
Using a 4 mm crochet hook and your yellow yarn, begin by creating a magic ring.
Remember: At the end of every round, join the round with a slip stitch (SL ST). Do not include the starting chain when counting your stitches.
Basic Crown Section (All Sizes)
Round 1:
- Make a magic ring.
- Chain 1.
- Work 8 half double crochets (HDC) into the magic ring.
- Pull the yarn tail tightly to close the center.
- Join with a slip stitch.
(8 stitches)
Round 2:
- Chain 1.
- Work 2 HDC stitches into each stitch around.
- Join with a slip stitch.
(16 stitches)
Round 3:
- Chain 1.
- Work 2 HDC into the same stitch, then 1 HDC into the next stitch.
- Repeat this pattern around.
(24 stitches)
Round 4:
- Chain 1.
- Work 2 HDC into the same stitch, followed by 1 HDC into each of the next 2 stitches.
- Keep following this pattern until you complete the round.
(32 stitches)
Round 5:
- Chain 1.
- Work 2 HDC into the same stitch, then 1 HDC into each of the next 3 stitches.
- Continue repeating this pattern around.
(40 stitches)
Round 6:
- Chain 1.
- Work 2 HDC into the same stitch, then 1 HDC into each of the next 4 stitches.
- Repeat around.
(48 stitches)
Baby Size
Round 7:
- Chain 1.
- Work 2 HDC into the same stitch, then 1 HDC into each of the next 5 stitches.
- Repeat around.
(56 stitches)
Rounds 8–15:
- Chain 1.
- Work 1 HDC into every stitch around.
Toddler Size
Round 7:
- Chain 1.
- Work 2 HDC into the same stitch, then 1 HDC into each of the next 5 stitches.
- Repeat around.
(56 stitches)
Round 8:
- Chain 1.
- Work 2 HDC into the same stitch, then 1 HDC into each of the next 6 stitches.
- Repeat around.
(64 stitches)
Rounds 9–16:
- Chain 1.
- Work 1 HDC into every stitch around.
Child / Teen Size
Round 7:
- Chain 1.
- Work 2 HDC into the same stitch, then 1 HDC into each of the next 5 stitches.
- Repeat around.
(56 stitches)
Round 8:
- Chain 1.
- Work 2 HDC into the same stitch, then 1 HDC into each of the next 6 stitches.
- Repeat around.
(64 stitches)
Round 9:
- Chain 1.
- Work 2 HDC into the same stitch, then 1 HDC into each of the next 7 stitches.
- Repeat around.
(72 stitches)
Rounds 10–17:
- Chain 1.
- Work 1 HDC into every stitch around.
Adult Size
Round 7:
- Chain 1.
- Work 2 HDC into the same stitch, then 1 HDC into each of the next 5 stitches.
- Repeat around.
(56 stitches)
Round 8:
- Chain 1.
- Work 2 HDC into the same stitch, then 1 HDC into each of the next 6 stitches.
- Repeat around.
(64 stitches)
Round 9:
- Chain 1.
- Work 2 HDC into the same stitch, then 1 HDC into each of the next 7 stitches.
- Repeat around.
(72 stitches)
Round 10:
- Chain 1.
- Work 2 HDC into the same stitch, then 1 HDC into each of the next 8 stitches.
- Repeat around.
(80 stitches)
Rounds 11–18:
- Chain 1.
- Work 1 HDC into every stitch around.
Adjusting the Hat Length
If you prefer a longer crochet duck hat, simply repeat the last round of your size until you reach your desired length before starting the brim.
Crochet Duck Hat Brim
After completing the main hat body, it is time to add the brim.
For the first brim round, you will work only into the front loop only (FLO). This creates a small ridge and gives the hat a neat, structured finish.
How to Work Into the Front Loop Only
When you look at the top of a crochet stitch, you will see two loops:
- The front loop is the loop closest to you.
- The back loop is the loop farther away from you.
For this section, insert your hook only into the front loop and leave the back loop untouched.
Remember to join each round with a slip stitch (SL ST) before starting the next round.
Brim Round 1 (FLO)
- Chain 1.
- Work 1 HDC into the same stitch.
- Work 1 HDC into each of the next 3 stitches.
- Repeat this pattern all the way around.
- Join the round with a slip stitch.
Continue working the brim rounds following the same pattern until the brim reaches your preferred width.
If you would like a wider brim, simply repeat the previous round until you achieve the desired length.
Once the brim is complete, fasten off the yarn and weave in any loose ends neatly.
Crochet Duckbill (Make 2 Pieces)
For the duckbill, switch to a 3.5 mm crochet hook and use your orange yarn.
You will create two identical duckbill pieces and join them together before attaching them to the hat.
Duckbill Piece 1
Row 1:
- Make a slip knot.
- Chain 6 stitches.
- Work 5 single crochets (SC) into the chain.
- Chain 1 and turn your work.
(5 stitches)
Row 2:
- Work 2 SC into the first stitch.
- Continue with 1 SC in each stitch across.
- Work 2 SC into the last stitch.
- Chain 1 and turn.
(7 stitches)
Row 3:
- Increase at the beginning by working 2 SC into the first stitch.
- Continue working SC across.
- Increase at the end of the row.
- Chain 1 and turn.
(9 stitches)
Row 4:
- Work 1 SC into the first stitch.
- Continue the increase pattern by working 2 SC into the next stitch.
- Repeat the pattern across the row.
- Chain 1 and turn.
Row 5:
- Continue increasing in the same way.
- Work SC stitches across while adding increases at both ends to create the duckbill shape.
- Chain 1 and turn.
Row 6:
- Continue following the same increase pattern until the piece reaches the desired width.
- Fasten off and leave a long yarn tail for sewing.
Duckbill Piece 2
Repeat the same steps to create a second matching duckbill piece.
Once both pieces are finished, place them together evenly and prepare them for joining.
Joining the Duckbill Pieces
- Place the two duckbill pieces on top of each other with the right sides facing outward.
- Join the pieces by crocheting around the edges using orange yarn.
- Work single crochet stitches around the sides to secure both layers together.
- Leave a long yarn tail at the end for attaching the duckbill to the hat.
- Turn the duckbill right side out and gently shape it.
Your crochet duckbill is now ready to be attached to the hat.
Assembling the Crochet Duck Hat
Now that all the pieces are complete, it is time to bring your crochet duck hat together.
Attach the Duckbill
- Place the two duckbill pieces together and make sure they are aligned evenly.
- Use your orange yarn tail to sew the duckbill pieces together, joining the edges neatly.
- Stitch through both layers, leaving the bottom edge open where it will be attached to the hat.
- Fold and shape the duckbill slightly to create a cute curved look.
- Use the remaining yarn tail to sew the duckbill securely onto the front of the hat.
- Position the duckbill approximately 4 rows above the bottom edge of the hat (not including the brim rows).
- Once the duckbill is firmly attached, tie off the yarn and weave in all loose ends.
Add the Duck Eyes
- Using black sewing thread and a sewing needle, attach the two small black buttons to the front of the hat.
- Place the eyes in the center area, around the 2nd and 3rd rows above the duckbill.
- Make sure both eyes are evenly spaced and securely sewn.
- Tie off the thread and hide the ends inside the hat.
Final Shaping
- Gently pinch and shape the duckbill to give it a natural beak-like appearance.
- Adjust the position of the duckbill and eyes if needed until you are happy with the look.
- Use your own creativity to personalize the placement and expression of your crochet duck hat.
Your adorable handmade Crochet Duck Hat Pattern duck hat is now complete and ready to wear!